Key Safe
Passbolt lets you manage all employee access credentials with a single instance on a Raspberry Pi.
The numbers of access-protected services on local networks and the Internet are on the rise, with password management tools enjoying far more prominence than ever before. Companies have to store and manage employee access data centrally to retain access to online accounts after employees have left the company. A Raspberry Pi in combination with the Passbolt server, lets you secure authentication data centrally at home or at work, making it easier for family members or employees to access their accounts.
Unlike most other password managers of this type, Passbolt does not focus on individual users, but on deployment scenarios with multiple users. You can easily install the program on a Raspberry Pi or a conventional server to then publish its resources so they are available to all users on the local network. Passbolt does not require any additional native installation on the clients because it comes with a web interface.
The password manager can import and encrypt data from and export data to other applications. By hosting the password safe in which the authentication data is stored in-house, you avoid the need for special security measures, in contrast to cloud-based password managers. Passbolt also enables convenient logins to web services with browser add-ons, without the need to install a native client first.
Thanks to sophisticated mechanisms, such as the ability to create groups with appropriate access authorizations, Passbolt can be configured hierarchically, which is useful, for example, if admins are only responsible for one department in the organization. The software also comes with a password generator, making easy-to-guess and therefore insecure authentication credentials a thing of the past.
Setup
The Passbolt server is frugal in its use of resources. As the basic hardware, all you need is a fourth generation Raspberry Pi. In terms of hardware requirements, the developers recommend a Raspberry Pi with a dual-core processor and 2GB of RAM. The minimum requirements are even lower: A Raspberry Pi 3 or even 2 is a candidate for smaller Passbolt installations. You also need an SMTP server to send email notifications and an Network Time Protocol (NTP) service, but you do not need to install a Linux, Apache, MySQL, Perl/PHP/Python (LAMP) stack for the Passbolt server on the Raspberry Pi. Because of outdated documentation, however, you need to watch out for a few pitfalls at install time that you can easily work around, if you know a few tricks.
To begin, copy a current Raspberry Pi OS version to a microSD card. You do not need the full software version because your password server will not need most of the programs included. Once you have prepared the microSD card, start the Raspberry Pi, complete the basic configuration, and then integrate the Passbolt server with the operating system. The official documentation is not likely to help you because it is outdated and relates to Debian 10 “Buster.”
The first step toward integrating the Passbolt server involves opening the /etc/apt/sources.list file in a text editor
sudo nano /etc/apt/sources.listand adding the Passbolt repository to the package management system:
deb https:/download.passbolt.com/ce/debian buster stableAlthough the repository is intended for Debian 10, it works just as well with the current Debian 12 “Bookworm.” Next, import the signature key for the repository, update the package sources, and install all required packages:
$ sudo apt-key adv --keyserver keys.gnupg.net --recv-keys 0xDE8B853FC155581D
$ sudo apt update
$ sudo apt install passbolt-ce-server
The routine also resolves various dependencies on the system for the Passbolt server, a local MariaDB database, and the NGINX web server. The Passbolt configuration wizard then launches automatically. The ncurses application interactively preconfigures all the required packages in a number of steps.
You need to define various authentication credentials for the database and will probably want to make a note of them. At the end of the basic configuration, you see a status message to that effect and the URL for accessing the Passbolt server, which will now work from any workstation on the local network. The Passbolt server prompts you to configure it again on first launch (Figure 1).
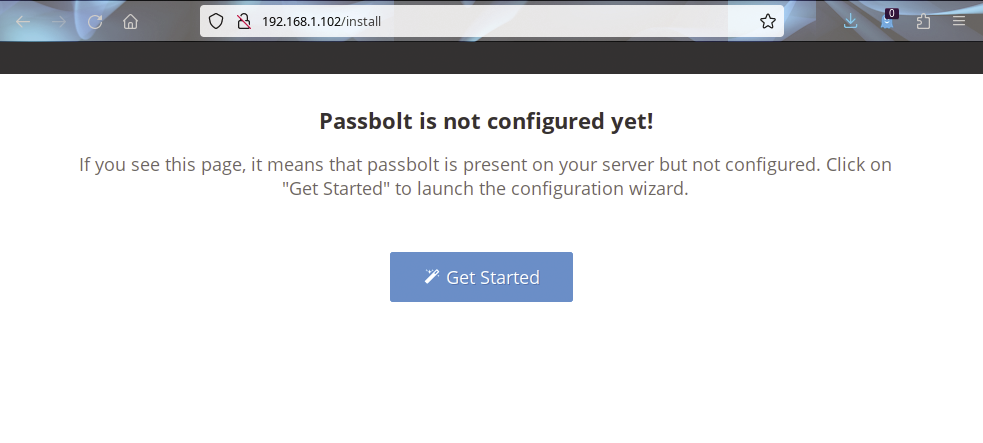
After clicking on the Get Started button, the routine checks the settings of the required components. A dashboard tells you which components have not yet been correctly implemented. The detailed setup starts after clicking on Start configuration. The first step is to set up access to the database and then generate a new OpenPGP key for the server. The routine then automatically takes you to the next dialog. When you get there, define the URL and specify whether you need to open an SSL connection to the server.
You also need to enter the email connection data for the SMTP server and then send a test message to make sure the settings you configured work. Email is used, among other things, to invite new users to use the Passbolt server and enable their accounts. Now create a new user and give it administrative privileges.
The configuration wizard then integrates the new settings into the software and sends you to a website where you can download the required browser extension, which ensures that when you access websites with authentication queries, you can take the relevant data directly from Passbolt and have it automatically entered into the relevant fields.
Now close the tab with the add-on list and reload the Passbolt page. The next task is to choose a passphrase for authentication on the Passbolt server. The routine creates a recovery kit, which you will want to store in a safe place. In the event of a system failure, or if you reinstall, you will need the recovery kit file to restore your Passbolt account. You can also use it when you need to integrate new devices with your authentication credentials with the Passbolt infrastructure.
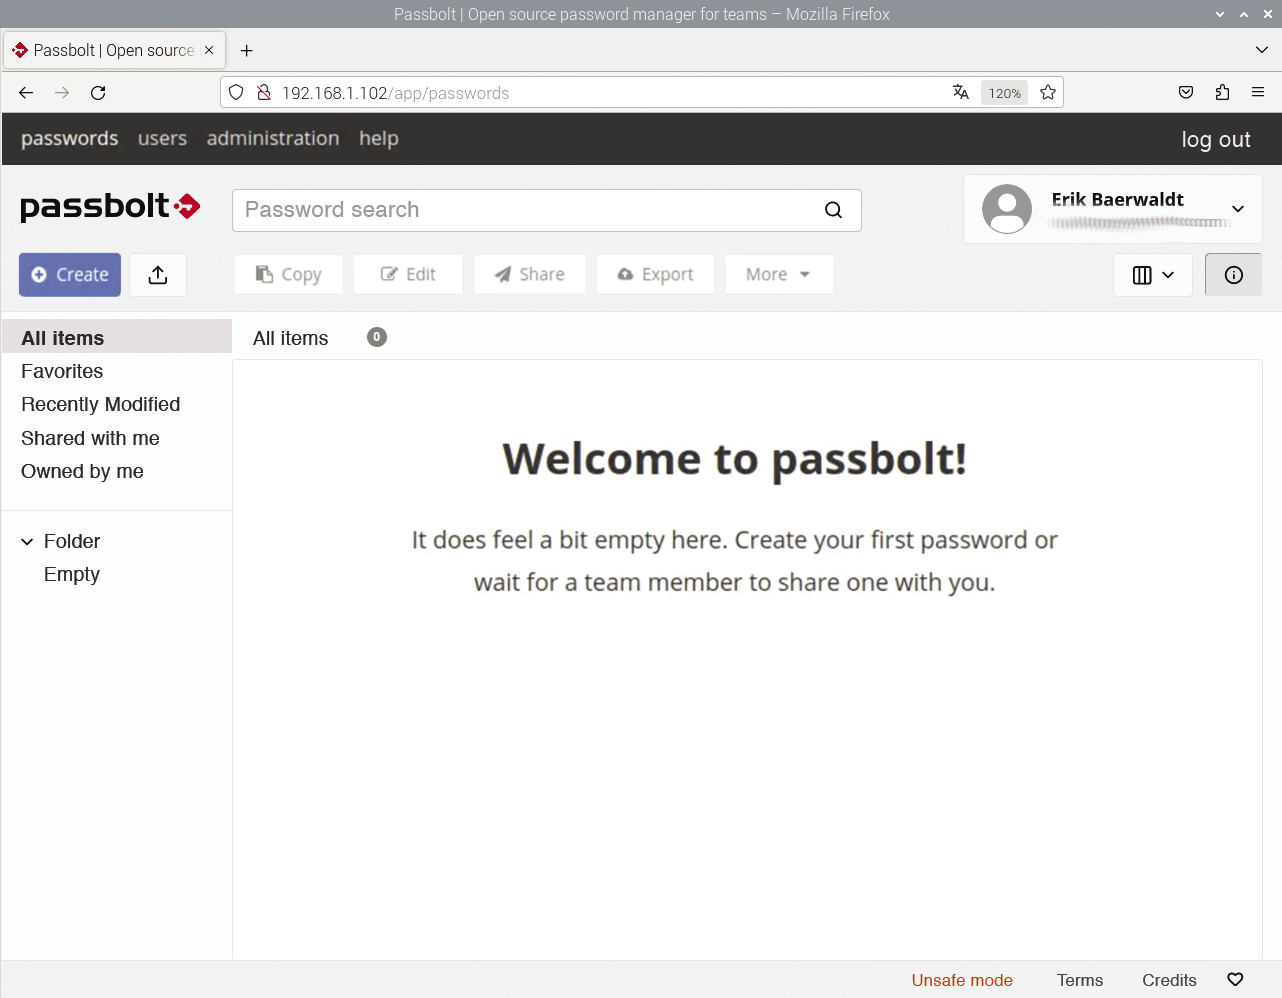
The final step is to create a security token to protect the system against phishing attacks. The configuration is now complete, and you can log in to your Passbolt server with the passphrase you entered previously. As the administrator, you are taken to the management interface (Figure 2).
Groups and Users
Passbolt lets you organize users in groups. The Create button opens the context menu, where you can create a group with Create group. Next, define the group name in a separate dialog and specify the Group manager in the dropdown beside the correct user. This person is you by default, because you are the only user who is currently a group manager. After you save the new group, it appears on the left-hand side of the browser window in the vertical bar.
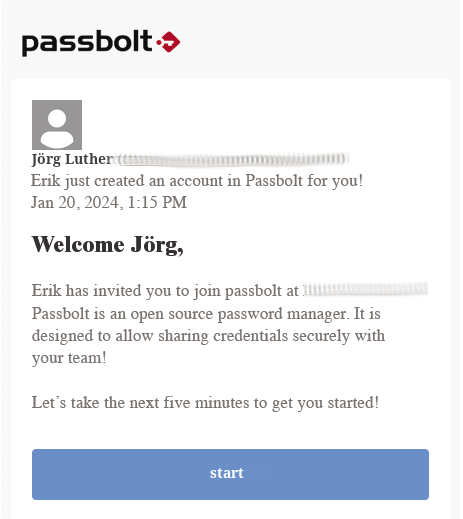
Add more users in the same way, entering their first and last names and email addresses in the dialog. By default, new users only receive normal user authorizations, but you can assign them administrative authorizations with the slide control. As soon as you press save, the software adds the new user to the system, and they appear in the user list in the main window. However, before users can save data in Passbolt, they first need to activate their accounts with the help of the activation email sent when they create an account (Figure 3).
To assign the users to the groups, right-click on the desired group and select Edit group from the context menu. In the dialog that follows, enter the names of users you created previously in the Add people field. Note that this only works if the users you want to add previously activated their Passbolt accounts from their activation messages.
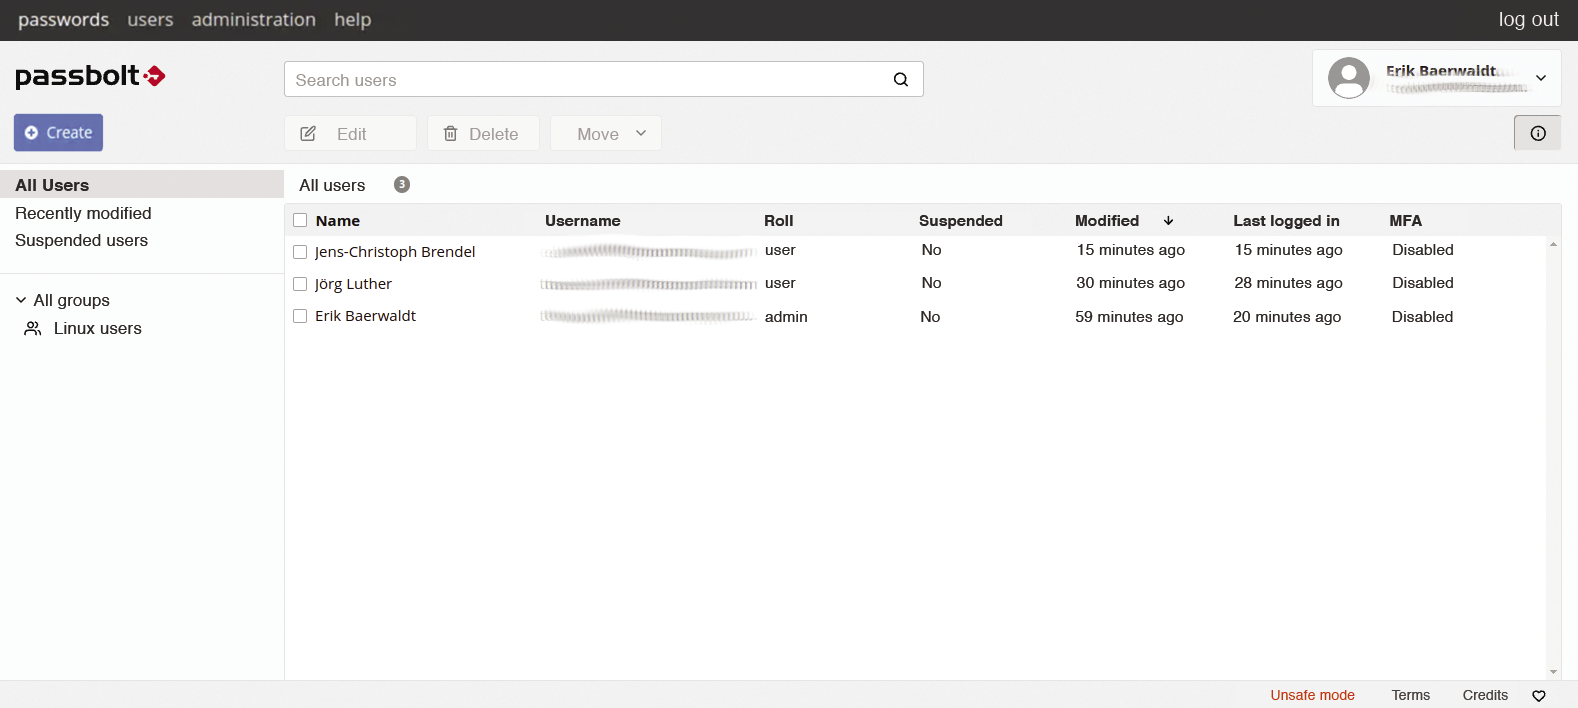
After saving the changes to the group, Passbolt transfers the new users to the list view of the dialog. In addition to the administrator who created the group, other members can be specified as group managers. You can view the list of active group members by left-clicking on the respective group (Figure 4).
Configuration
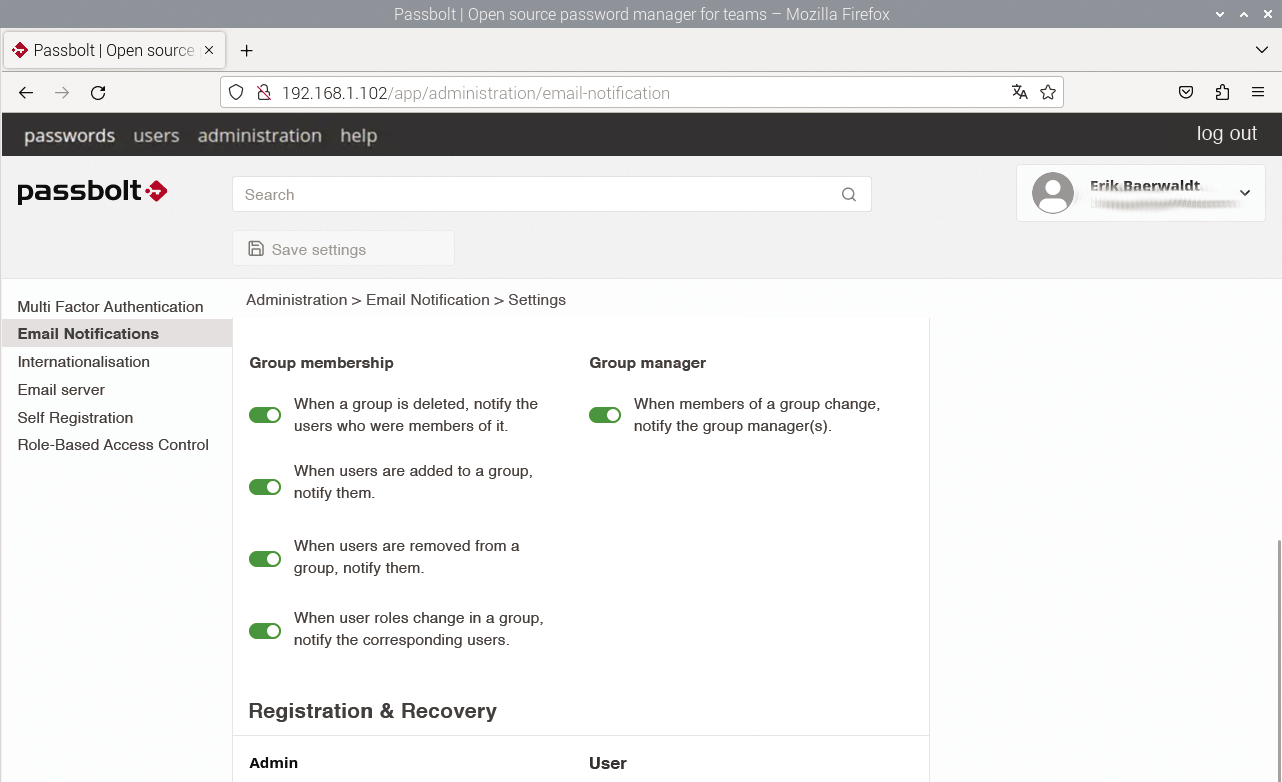
To assign access authorizations to individual users in Administration, use the various configuration options in the interface. First open the Role-Based Access Control dialog at the bottom of the vertical bar. You can then individually grant or revoke numerous rights to and from administrators and users in the two columns on the right. Another important configuration dialog is found in the Email Notifications category, where you can (de)activate various notifications with the slide controls (Figure 5).
User Interface
Users without administrative privileges see a slightly different user interface after logging in. The Administration menu item is no longer available, but new passwords and folders can still be created by selecting Create. Users can defines authentication data for any website under New password | Create password, optionally adding a description before saving their actions. To do this, they first need to enter their own user password. After doing so, and only then, the new authentication entry is added to the list view in the main window.
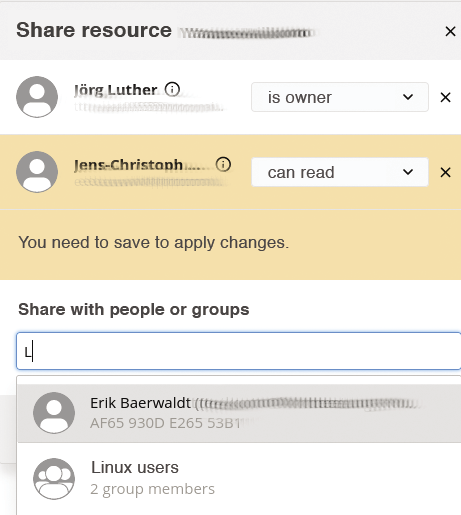
Users can also share passwords with each other (Figure 6). To do this, users need to click on the Share button and select the relevant users or groups in a separate dialog. By default, other users can only read the passwords; the password owner needs to allow any modifications explicitly. However, sharing only works after the user has re-entered their passphrase.
Users can also export passwords in the list view. After pressing the button, the software prompts you for the file name for the passwords to be exported. Passbolt then exports the data in KeePassXC format so that the credentials can be read and processed in other applications. The function for deleting passwords from the list can be found under More; however, it is only available to owners and not to users with read-only authorization.
Extension
The developers offer two browser extensions that help you add authentication credentials to the system without having to go through time-consuming dialogs in the Passbolt administration interface. The extensions can be integrated into Firefox or Chromium and their derivatives, and they support convenient authentication data management and creation options for individual websites.
New authentication data can be added to the Passbolt system from a red diamond with a white key that appears on the right-hand side of the input box for the username when you access a password-protected website. After clicking on the icon, a small window opens in which you then need to select Create a new credential.
The next dialog then accepts your access data. The URL is already correctly preset, but you need to add the other authentication data and the website name manually. As soon as you press save, the window closes; you then see a smaller dialog with the access data in abbreviated form. To use the previously saved data for authentication, confirm by pressing use on this page. At the same time, Passbolt transfers the credentials to the list view of the administration interface.
If you call up this access-protected site again some time later, a window with the name of the page opens after you click on the extension icon with the white key. Pressing the icon again transfers the authentication data stored on the Passbolt server to the matching fields on the website and you can log in.
Conclusions
Passbolt server finally puts an end to sticky notes with authentication data in the home network or in corporate teams. Passbolt pays particular attention to the security of the server. For example, the application regularly prompts for the user password when authentication data is entered manually, and the same applies to sharing. If someone tries to log in to the Passbolt server with a web browser already used by another person, this user needs their personal key, which is generated whenever a new user is created and stored in a file. If the person does not have this key, the login attempt fails.


