Solar-Powered Pi Pico
Powering your Pi Pico with solar may not solve the current energy crisis, but it will save you from changing or recharging batteries.
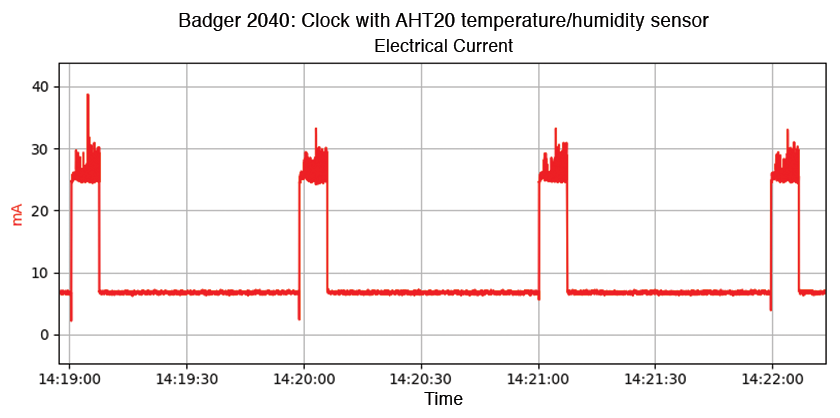
My idea to add solar power to a Raspberry Pi Pico started with a previous project that displayed the time, temperature, and humidity on an e-paper display with a Pi Pico integrated on the back. For that project, I used a Badger 2040 by Pimoroni (Figure 1).

The system wakes up once a minute, updates the sensor values and time, and then falls back into deep sleep. Figure 2 shows the power draw for the Badger 2040: seven seconds of activity at approximately 27mA of power consumption compared to 53 seconds at 6.5mA. The relatively low power consumption prompted me to consider using a solar panel to power this setup even in less favorable light conditions.
Solar Panels
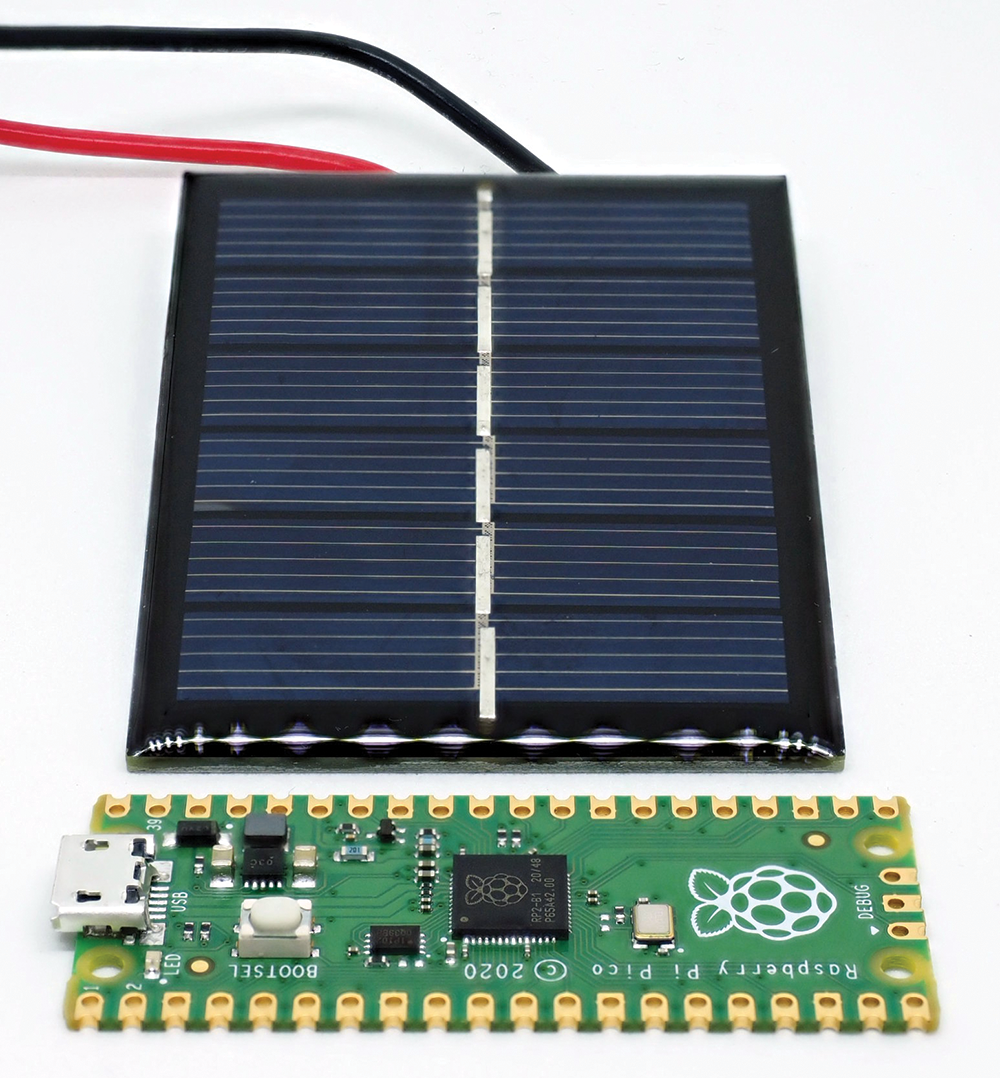
Some brief research showed that small solar panels like the one shown in Figure 3 are available from the usual sources for a relatively low price. For my test, I chose a panel by Pimoroni that delivers a nominal 100mA at 3V. For a Pi Pico without anything attached, 3V works fine, and the Badger 2040 is also happy with this, so in theory this should work. Unfortunately, the available power is very rarely equivalent to the nominal output, which means that things are not quite so simple.
Measuring the open-circuit voltage at different points was disheartening. While the panel still supplies some voltage while sitting on the windowsill, this is no longer the case once you move the panel inside the room. Connecting several panels in a series would probably help here, but the more sensible alternative at this point is to go straight for 6V panels, which are twice as big, but still classified as mini panels. The price scales with the size here: Typically, three 6V/3W panels cost EUR20 (~$22).
Some solar panels have a prefabricated connector. If your choice of panel does not have one, all the better. You can then tailor it for your own projects, for example, with screw or plugin connections. But don’t expect too much from the quality of the panels, because you are unlikely to find high-quality photovoltaic cells in small cheap panels.
Disillusionment
While powering the Pi Pico directly would seem straightforward given that the panels provide enough voltage and current, appearances can be deceiving. The specifications refer to the no-load voltage and the short-circuit current. But the voltage/current profile for solar panels is extreme (Figure 4). Most figures similar to Figure 4 on the Internet will show you several such curves within a graph for different lighting conditions (e.g., darker, flatter).
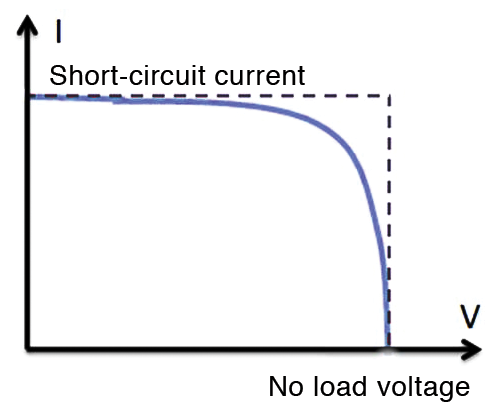
You need to read Figure 4 from right to left. Without any load (and with sufficient sunlight), the voltage reaches the nominal value. However, as soon as current flows, the voltage collapses (the horizontal part of the curve). With a 6V panel, the residual voltage is not enough even for a Pi Pico.
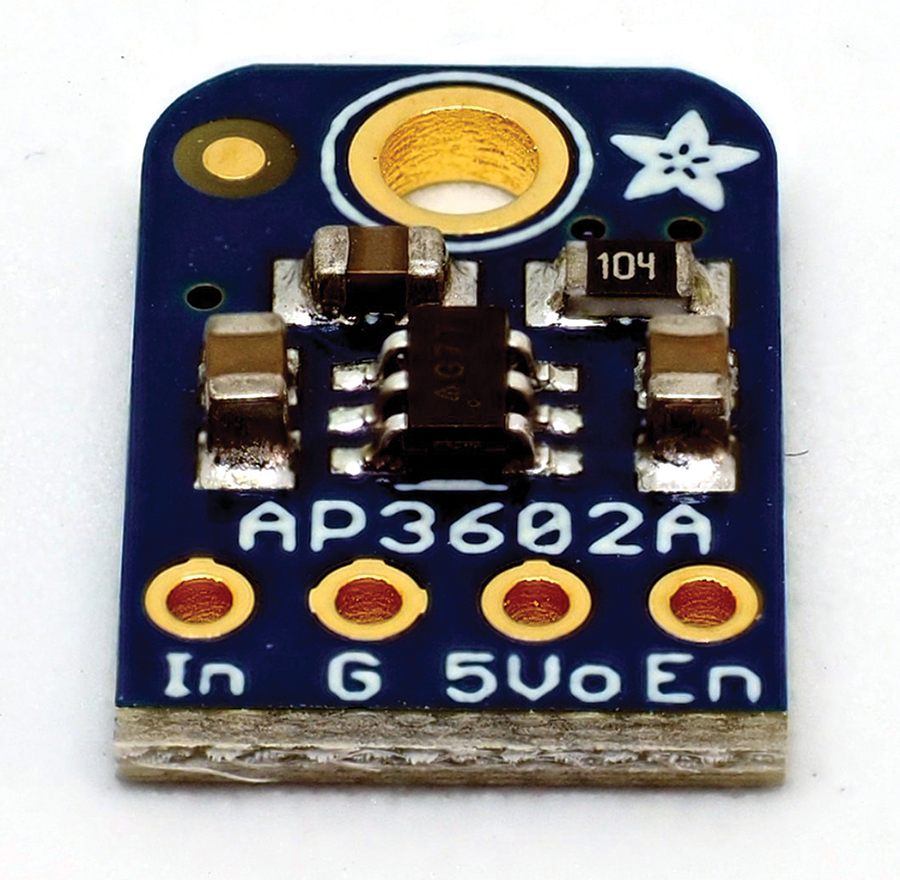
One way to stabilize the voltage is to use special step-up converters, which are available for very low voltages. However, their size makes them impractical for DIY builds, and ready-made breakouts are also not easy to find. Even the small AP3602A shown in Figure 5, which is happy with voltages as low as 2.7V, is not suitable for operation with solar panels.
Buffer Storage
The voltage problem can ultimately be solved by using a special chip in combination with a buffer battery. The chip monitors the voltage and regulates the current so that the voltage does not collapse. The battery acts both as an energy storage device and as a supply source to ensure stable operation for a consumer.
Adafruit sells a special solar charger (Figure 6), and a new updated and cheaper version is now available. This solar charger does without the thick electrolytic capacitor and can also handle a higher input voltage of up to 10V. Two different input jacks give the breakout flexibility. The same applies to the outputs. Again, you are not limited to the JST connectors. There are also pin connectors that you can use, for example, to route the LED signals to the outside, if you decide to put the component in a case.
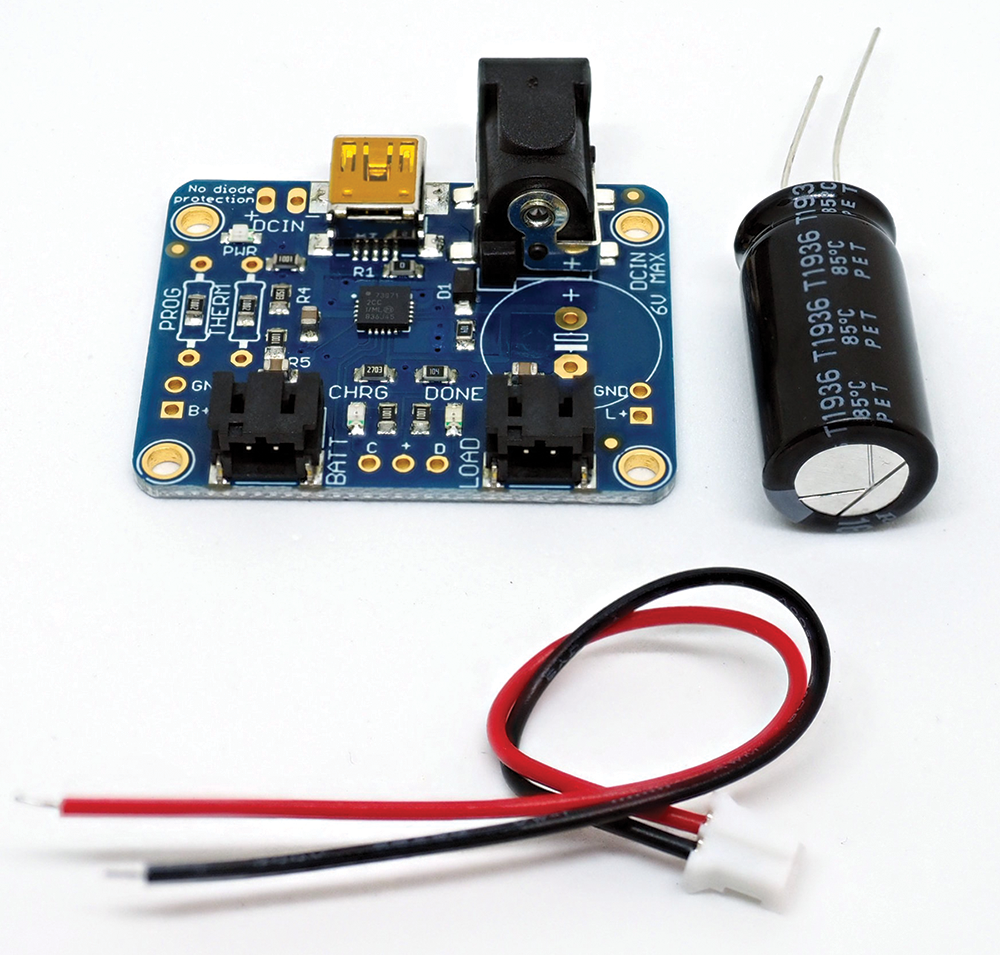
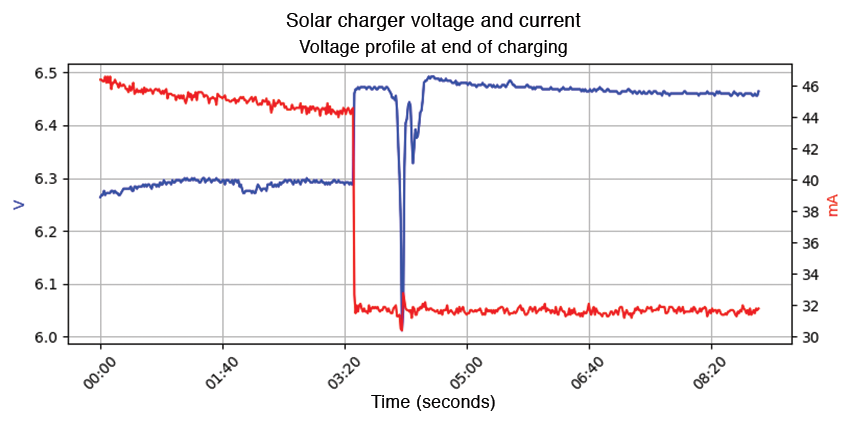
Figure 7 shows the voltage/current curve at the end of the battery charging phase. There is a load attached from the solar charger next to the battery that has a constant current draw of around 32mA. As soon as the control electronics switch off the battery, the current drops to this value, while, simultaneously, the voltage quickly rises.
The old version of the solar charger had a design flaw. It passed the input voltage directly to the load. A microcontroller directly attached to the charger was then fed 6V or more when the sun was shining, which meant you also needed an intermediate controller, such as a TMS1117-5.
The new version of the solar charger limits the voltage on the output side to a maximum of 4.4V and does not cause any problems in this respect.
Conclusions
Unsurprisingly, using a small solar panel with a Pi Pico doesn’t work if the sun isn’t shining. Inside the apartment, you may be able to charge the battery if you have the solar panel in the sun on a windowsill, but things look different outdoors. The big advantage is the low-maintenance setup, because it eliminates the need for regular battery swaps or recharging.
Mini solar panels will not do anything to alleviate the energy crisis, and it is questionable whether the cost of the panel and charging circuit will pay for itself. But, for outdoor sensors, this point is hardly relevant weighed against the convenience factor. Thanks to simple components, setup challenges for mini solar panel hobbyists are kept to a minimum. The most difficult part might actually be sourcing reliable panels.