Domestic Service
CasaOS puts even newcomers in a position to roll out Docker-based services on a Raspberry Pi at the push of a button.
Home servers are on the rise and if you can host your services yourself, you will benefit in several ways. Besides saving on the monthly costs for subscription services or a rented virtual server from a hosting service provider, regaining your data sovereignty can be an important motivation. The data stays where it belongs: on your network. Of course, this requires a configuration that takes security seriously.
With expert knowledge, you could build a home server from scratch and run the required services on it using Docker. But deployment-ready solutions such as Proxmox or Unraid will help you achieve your goal in a far easier way. The catch is that they still require a certain amount of knowledge and understanding, at least during the setup phase. CasaOS shows that there are also lean solutions that offer everything many users need. You can preview a demo version of the system on the website. I have tested the software on a Raspberry Pi 5, but a Raspberry Pi 4 should work fine as well.
No Operating System
Shanghai-based IceWhale Technology Ltd. develops CasaOS for its own ZimaBoards, which have attracted a kind of cult following over the past year. The name CasaOS is somewhat misleading, as it suggests that it is an operating system. However, CasaOS is actually a browser-based graphical user interface that requires an operating system to be in place.
While CasaOS is strongly community-driven, IceWhale is working on a pro version named ZimaOS in the background. ZimaOS runs on ZimaBoards and other x86_64 hardware, but not currently on the Raspberry Pi. It is still beta software and promises a number of improvements over CasaOS such as easier remote access and automatic backups. RAID support and standardized management for cloud and local storage are on the list for the near future.
Raspberry Pi 5
Since IceWhale did not provide me with a ZimaBoard, I installed CasaOS on a RPi 5. With a lightweight distribution in the background, even a RPi 4 should have enough resources to properly run the software. CasaOS can also be installed on arbitrary hardware using the x86_64, ARM64 and ARMv7 architectures.
Since I need an operating system that runs CasaOS, I installed the 64-bit version of the current Raspberry Pi OS on a 64GB SD card. If you have the right adapter, the RPi 5 also supports booting from an NVMe SSD as an alternative. On Windows 10/11, CasaOS runs in the Windows subsystem for Linux (WSL2).
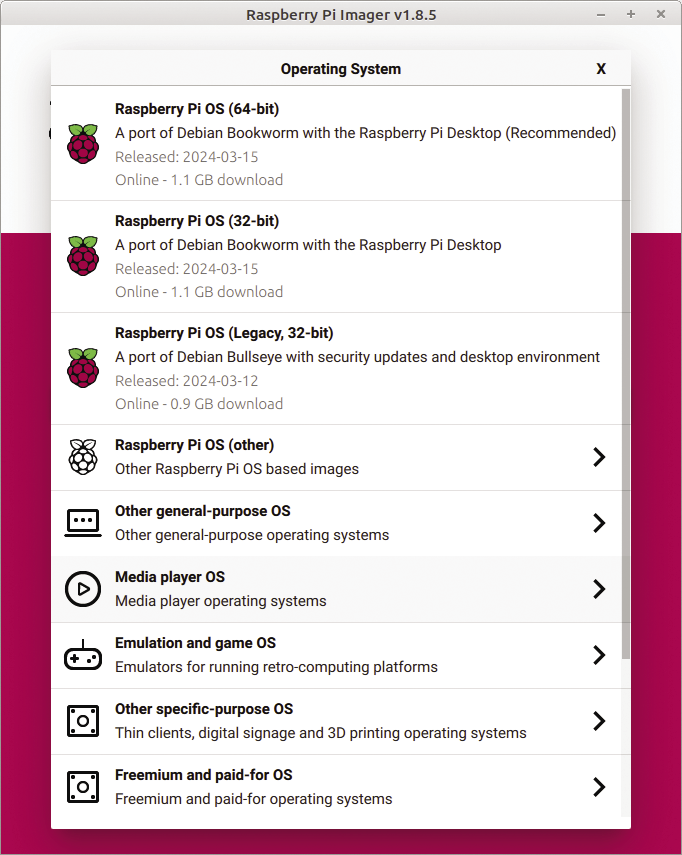
I used the official Raspberry Pi Imager tool, which most distributions include in the repositories (version 1.8.5 is currently available) for writing the SD card (Figure 1). The process is well documented, so I will not go into it any further. Incidentally, Imager not only downloads and installs the official Raspberry Pi OS, but also Ubuntu and some specialized Linux distributions if required. If you only want CasaOS to run on it, Raspberry Pi OS Lite (the desktop-less version) or Ubuntu Server without a desktop environment is fine.
Fully Automatic Installation
With your choice of distribution written to the SD card, place it in the Raspberry Pi, connect it to the local network with an Ethernet cable, and turn it on. You can also connect a display, keyboard, and mouse to run the next steps in a terminal window on the Raspberry Pi, or you can access it via SSH. The first step is to update the system in the usual way:
sudo apt update && sudo apt upgradeIf you want to use WiFi, turn it on now and connect to your router. Then download CasaOS by running the installer script from the project website; the currently available version is 0.4.9:
curl -fsSL https://get.casaos.io | sudo bashAfter about a minute, the process should be completed and the installer will display two HTTP URLs for connecting via Ethernet and WiFi (Figure 2) – if you have not enabled both connection methods, you will only see one URL.
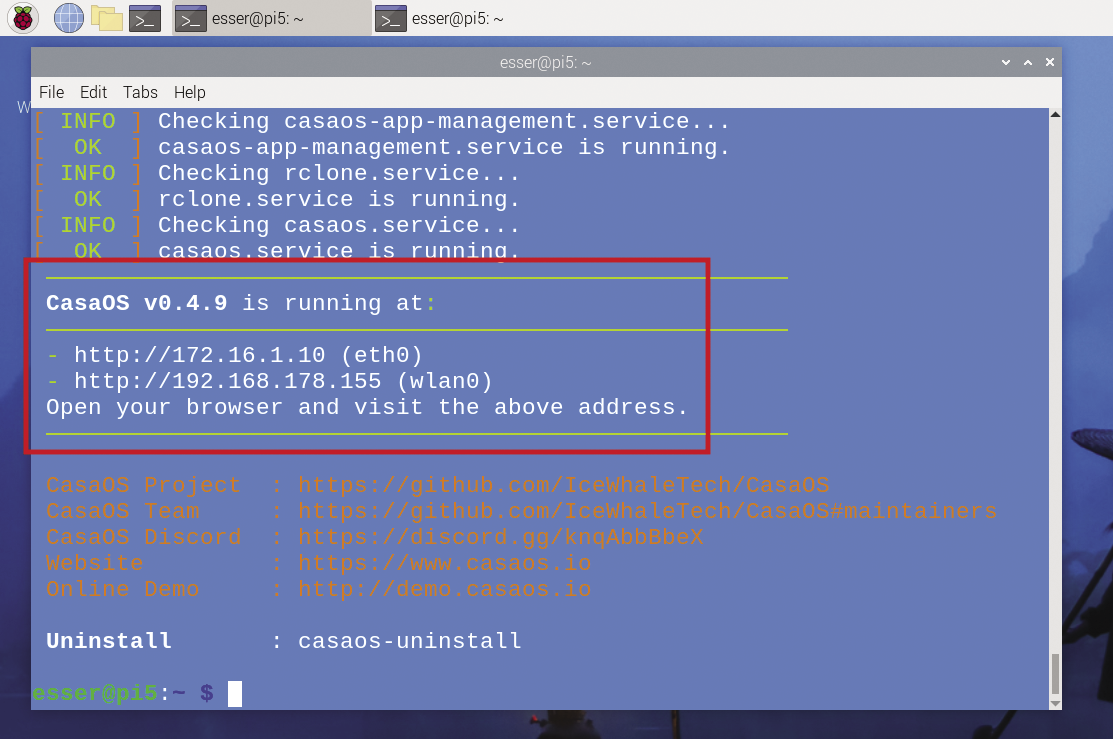
When you type the link in your browser, CasaOS welcomes you and prompts you to create an account. Note that this is not a regular user account on the Raspberry Pi; you only need it to access the CasaOS web GUI. The server processes run with root privileges.
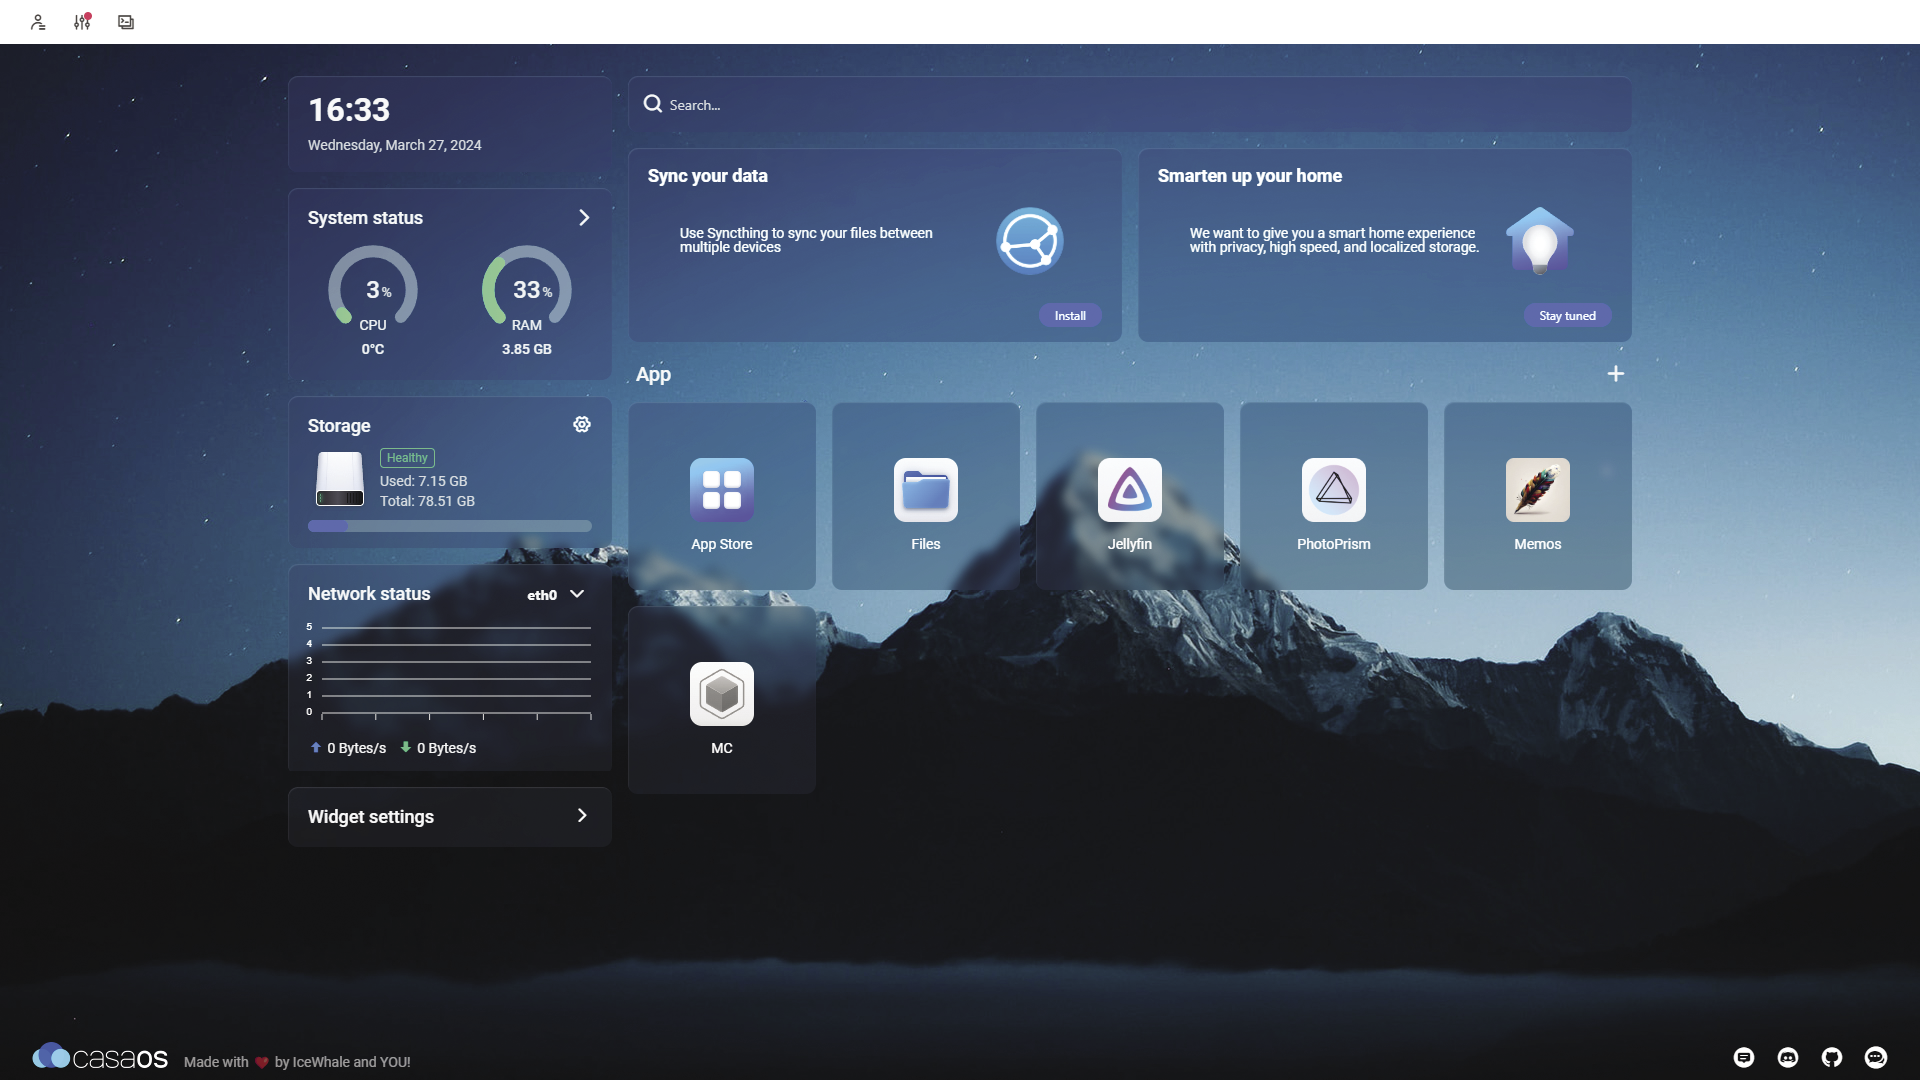
After logging in, you will find yourself on a clear-cut dashboard that contains information on CPU, RAM, storage and network usage as well as links to the App Store and a file manager. The software also offers to install Syncthing via widgets to synchronize your data and provides an introduction to the smart home. You can specify which widgets you want to see on the dashboard by clicking on Widget settings on the bottom left (Figure 3).
Adding Services
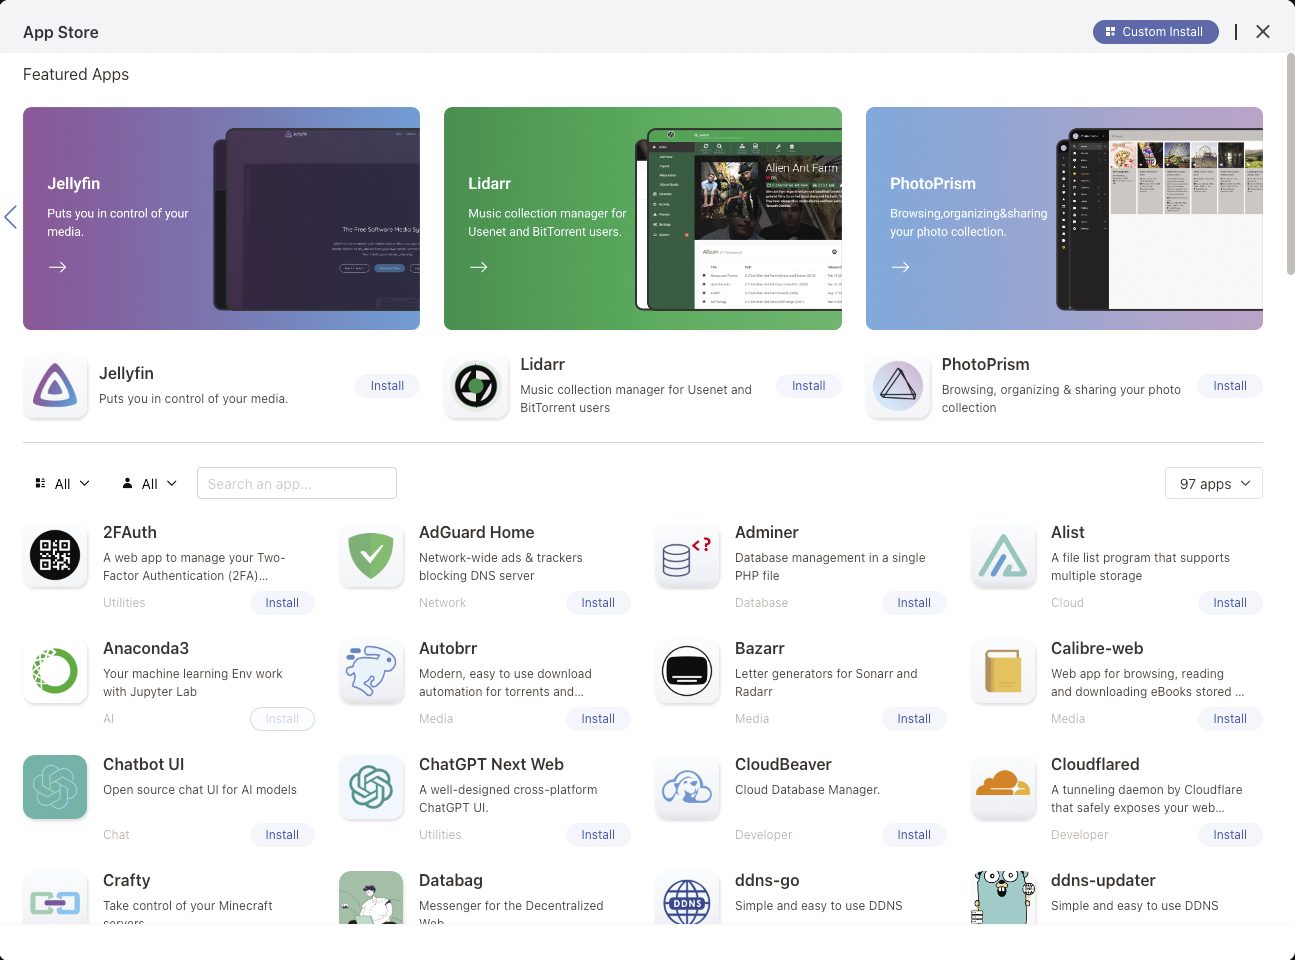
To roll out services in CasaOS, visit the App Store (Figure 4), which currently offers just shy of 100 applications for installation in Docker containers at the push of a button. First, I installed Nextcloud, which took around 90 seconds on the RPi 5. A click on the new icon in the dashboard starts the application, and you can complete the installation in just a few minutes.
This Nextcloud version uses an SQLite database by default. If you want it to handle more serious tasks, it is recommended to run a MariaDB or MySQL database in a separate container. In this case, it makes sense to first deploy Portainer in CasaOS and use it to install Nextcloud and the desired database with Docker Compose. However, describing the steps would go beyond the scope of this article.
You can install other apps just as quickly, such as the powerful photo manager PhotoPrism, the Jellyfin media server, the Pi-hole ad blocker or the ChatGPT Next AI bot, and many other services. I tested 10 applications, all of which were available for use immediately after installation. On two occasions, an app only started on the second attempt, but this only affected the first launch and did not occur again. It is best to wait a little until the CPU utilization display has dropped off again after an installation: The start button reacts immediately if you do that.
Extending the App Store
You can add more entries to the App Store by including additional repositories. That option is slightly hidden. On the right, below the suggested apps, there’s a drop-down menu which by default shows the number of available apps. Click it and select More to open a new web page with links to other repositories, including one with more than 100 Docker images maintained by the LinuxServer.io community. Copy the URL, go back to the CasaOS browser tab (or window), click on the drop-down menu again but this time select More apps, paste the URL in the field with the question mark, and press Add. This will increase the number of available applications to 279.
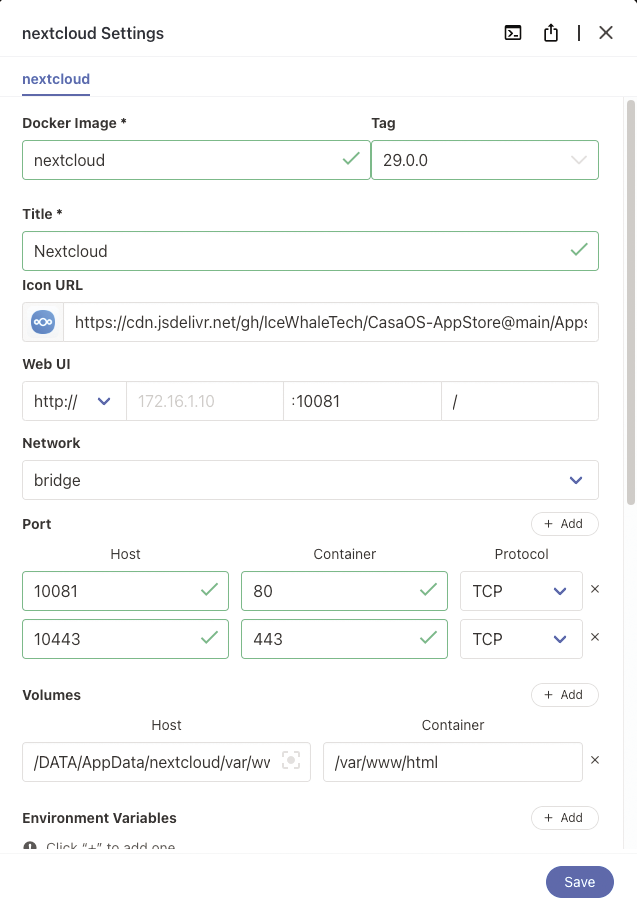
However, the App Store is not the only option for rolling out applications. You can click the Custom Install button in the top right corner of the App Store window to install custom apps. Fill out the fields with the necessary information, such as the name of the Docker image you want to use and the IP address, including the ports, of the host and container. This requires some more knowledge of Docker speak, but you can find out how this works in just one afternoon. If you click on the three dots at the top right of a previously installed application on the dashboard and open Settings, CasaOS shows you the same dialog, but with all fields pre-filled for that app – that should give you a good idea of the kind of information you need to provide (Figure 5).
Docker Compose
There is another option for rolling out containers: using a predefined Docker Compose file in YAML format. You will find many such files for various Docker images on the Internet. In order to use Docker Compose, open the custom installation dialog again. This time, don’t fill in the form fields, but click on the small right arrow icon in the top right corner of the window. In the Import dialog, you can then drag and drop a Docker Compose file to the lower area.
Theoretically, you could use Compose files to roll out and connect several containers in one go, for example, Nextcloud with MariaDB or MySQL as mentioned above. However, that feature is not yet implemented in CasaOS. If you copy a Compose file that describes several containers into the window, CasaOS currently only builds the first container. As soon as the software supports the function, you can dispense with the above-mentioned detour via Portainer.
Conclusions and Outlook
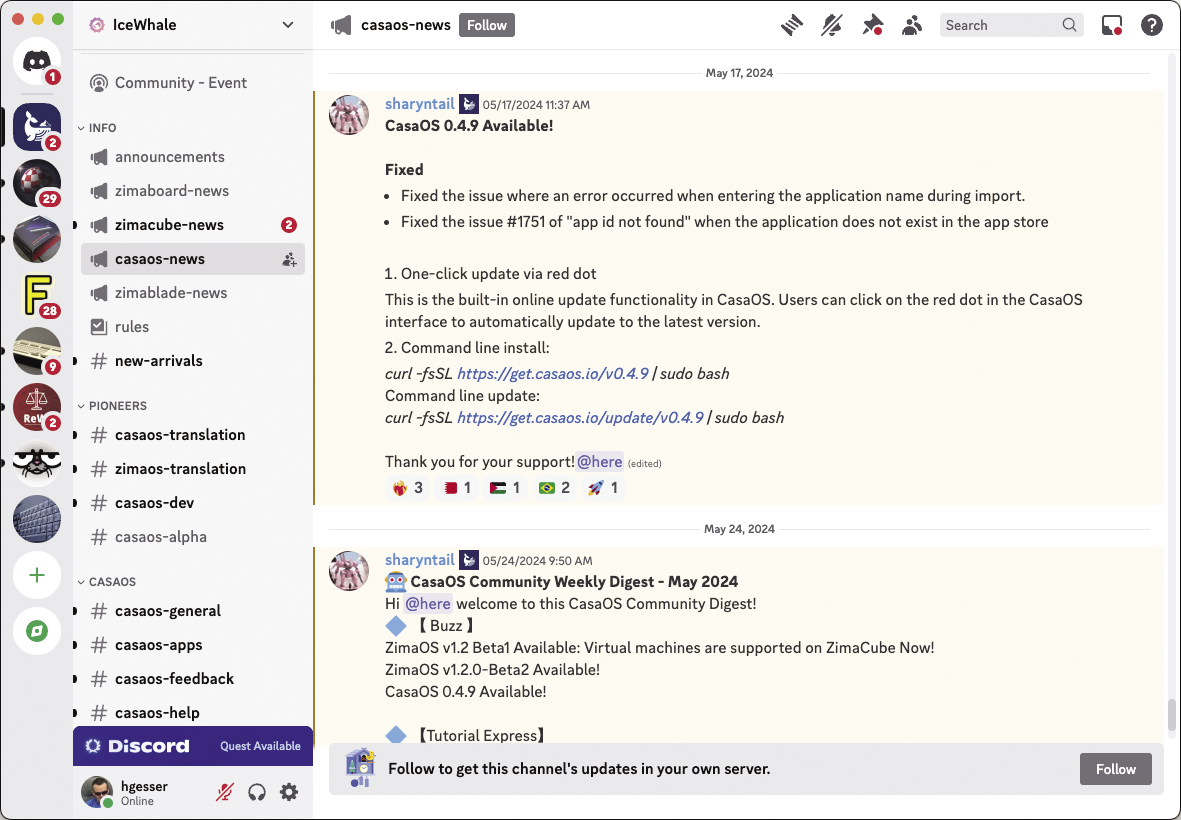
Regardless of whether you want to make your first foray into the home server realm or simply don’t want to delve any deeper into the subject of Docker or Docker Compose, CasaOS performs well, provides applications quickly, and is easy to use – even though the system and documentation are still under development. More help is available on a Discord server (Figure 6), which includes a forum.
I would have appreciated an integrated backup solution, but this does not only apply to CasaOS. Similar projects do not implement this important aspect intuitively enough either. Duplicati, for example, can be installed quickly from the App Store, but setting up a backup of the relevant data from the containers is likely to be too much for most beginners.
All told, CasaOS is by far the quickest and easiest way to get a home server up and running. Advanced self-hosters will probably miss deeper intervention options, such as those offered by the far more complex Unraid project.

