And … Action!
The top dogs in the media server space now face some competition from Jellyfin, a relatively young project that impresses with a number of innovations.
Kodi and Plex are well known, mainly because of their availability on multiple platforms. Although you can easily run Kodi on virtually any Linux derivative, Plex also supports many network-attached storage (NAS) systems, which you can use as media servers while providing huge storage capacity for multimedia content. Jellyfin, which was first released in 2018 and is derived from the Emby media server, also focuses on Linux as a platform but supports the Flatpak package management system and Docker container environments, as well. The newcomer is also suitable for use on the Raspberry Pi, meaning you can use the small computer as an energy- and space-saving media server for your home theater.
Like the Plex Media Server, Jellyfin is a client-server application. Client applications that retrieve and play content from the server are available for all popular desktop operating systems, but also for mobile devices such as smartphones and tablets. The easiest way to play multimedia content from the Jellyfin server, though, is to open it in a web browser. You do not have to install a browser extension or dedicated client software, which makes the playback method an ideal choice for desktop systems.
In contrast to Plex, Jellyfin works without forcing you to have a connection to a cloud server. The Jellyfin media server can provide content without an Internet connection, which means you can use offline and online sources at the same time. Another Jellyfin advantage is the license model. The Plex Media Server vendor sells Plex under what is known as a freemium model that only lets you access the basic functions free of charge. Extended features are only available if you have a commercial Plex Pass, and some apps require users to pay an activation fee. Moreover, US-based Plex reserves the right to collect customer data and share it with partners. The aim is to serve up advertising in a more targeted manner. Jellyfin, on the other hand, is completely free and does not market any user data.
Downer
Jellyfin can transcode video files to make them available if codecs are not available. Various types of hardware acceleration are used, with a modified version of FFmpeg acting as the transcoder. Content transcoding is not limited to encoding and decoding the data but also includes things like deinterlacing and scaling.
Unfortunately, the Raspberry Pi lacks hardware support for many functions, so content is transcoded exclusively on the software side, which ties up massive amounts of compute power. The developers therefore explicitly advise against running the Jellyfin server on a Raspberry Pi. On a brighter note, I only saw increased latency with various image formats with high-resolution content that required scaling. The recommended approach is to avoid enabling hardware acceleration for transcoding, at least on the fourth generation Raspberry Pi.
Installation
To begin, install the latest 64-bit version of Raspberry Pi OS; don’t go for the most extensive image with a complete suite of application programs – one of the smaller images will be fine. Your system’s microSD card needs to support the fastest possible data transfer standard to avoid becoming a bottleneck and leading to unnecessary latency when transferring large volumes of data.
After you have installed and updated the operating system, pop up a terminal after a reboot and integrate the Jellyfin server into the system. The developers not only provide extensive documentation for several Linux distributions but also offer a ready-made script for Debian and Ubuntu users that integrates the Jellyfin repository into your system and carries out the installation:
$ curl https://repo.jellyfin.org/install-debuntu.sh | sudo bashThe script then completes all the necessary steps and launches the Jellyfin server.
When done, use a conventional file manager or the command line to create a directory structure for the content to be backed up locally. Create separate directories and subdirectories for videos, audio files, trailers, and so on. Please bear in mind that Jellyfin distinguishes between films and series and therefore may require several directories. To ensure that the directories can all be addressed later in the dialog to be used for creating libraries, define file access control lists by entering the command:
$ sudo setfacl -m u:jellyfin:rx // You can now access the Jellyfin server on the Raspberry Pi from any machine on your intranet by typing http://<RaspPi IP>:8096 in a web browser. In the next step, you are taken to a configuration routine with localization options, if you need them. Next, set up a user with authentication credentials (Figure 1).
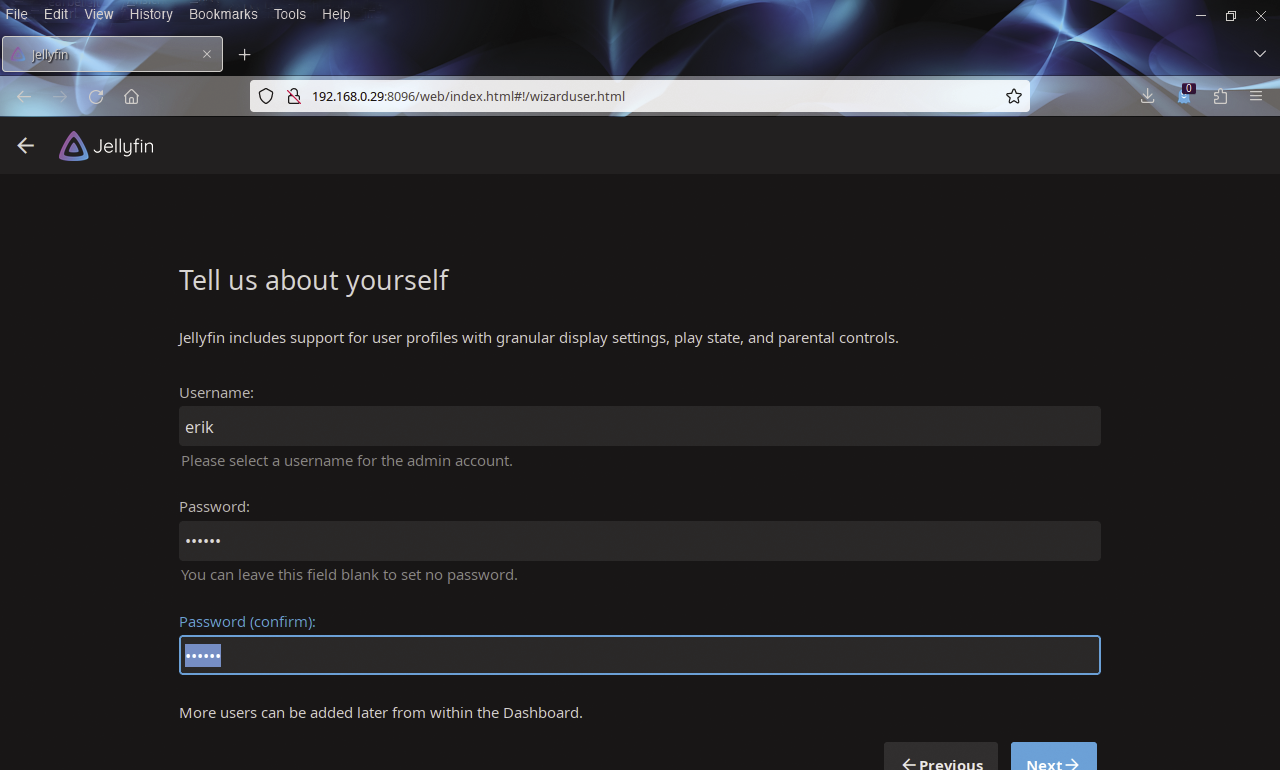
Now, create an initial media library by clicking the Add Media Library button. In the dialog, specify the type of multimedia content, how the software should display the library, and the path to the library. You can also define the preferred language in which you want Jellyfin to load the content.
In the further course of the Settings dialog, you can use predefined settings to specify the source from which you will be fetching metadata for the multimedia content, such as information on tracks or photos of the artists. All you have to do is check the boxes to target the source servers. Once you have made all the settings, press OK to confirm. The software now switches back to the overview and displays the newly created library.
Clicking Next takes you to a dialog in which you can specify the preferred language for the metadata to be loaded. As in the previous dialog, simply use the selection boxes. In the final step, you can allow direct access to the Jellyfin server from the Internet from other computers or mobile systems. Click Finish to complete the basic configuration; the routine now loads the metadata of the individual content for the newly created library off the web.
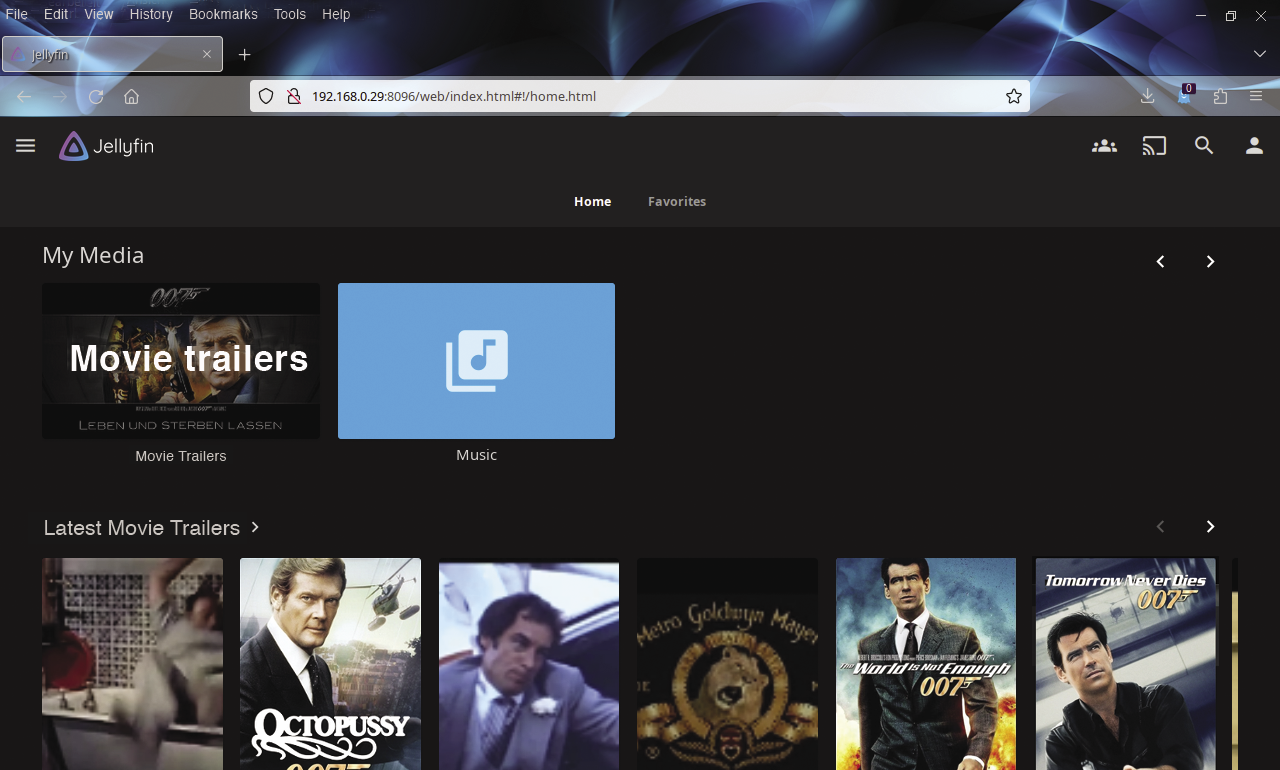
A window opens where you can log in to the server. After entering your credentials, you are taken to your individual user interface. When you get there, you will see the libraries you created lined up horizontally at the top, and the individual content of the libraries appears below (Figure 2).
Operations
Scrolling to the left or right with the arrow keys above each library lets you browse the folders. As soon as you mouse over the content images, a play button appears in the middle to let you play the content. If necessary, the application transcodes the existing data on the Raspberry Pi and sends it to the web client. The integrated playback software then plays the content in the client computer’s web browser.
For audio files, only the playback software controls appear in the lower part of the web browser. If you click on an audio collection in the library view, Jellyfin hides the other libraries, and you can view the details of the selected collection. In this view, you can also start playback by clicking on a track or saved album. At top center in the browser window you will then find a control bar that you can use to compile a playlist from individual tracks, display information about the individual artists, or call up a song list.
The left arrow at top left in the browser window switches back to the main window. If you previously enabled audio file playback, you will continue to hear the playback on the client computer. Audio playback only ends if you switch to a video file or cancel manually.
In the video file overview, you will find an options bar at the top that can be used to display the movie genres, create trailers or collection lists, or view individual movies marked as favorites in an overview. To add a movie to this list as a favorite, click on the small heart at the bottom of the preview image. In the preview of the individual libraries, you can also click on the Favorites link in the options bar at the top to call up your favorites right away.
If you want to see more detailed information on individual content, click on the preview of an audio or video file. A neat window then appears showing the preview image on the left and detailed information about the movie or audio file on the right (Figure 3). A small options bar at top right lets you start playback, add content to your favorites list, or – in the case of films – view a trailer. For audio files, you’ll see a track list, which you can use to play individual audio tracks from an album.

Settings
Each user has a settings menu to help them customize the interface. To access the menu integrated in the control bar, use the hamburger menu top left in the browser window. You will now see the control and admin menu. The top category, Media, shows the libraries available in your installation, and you can call up the admin menu lower down.
Global system settings are on the Dashboard page. The software lists the various configuration options for the server at top left. Lower down, you can configure various settings for external devices, but also for troubleshooting. In the larger window segment on the right, the dashboard displays the Jellyfin server’s technical data by default, including a list of activities on the server, as well as all actions individual users have performed (Figure 4).
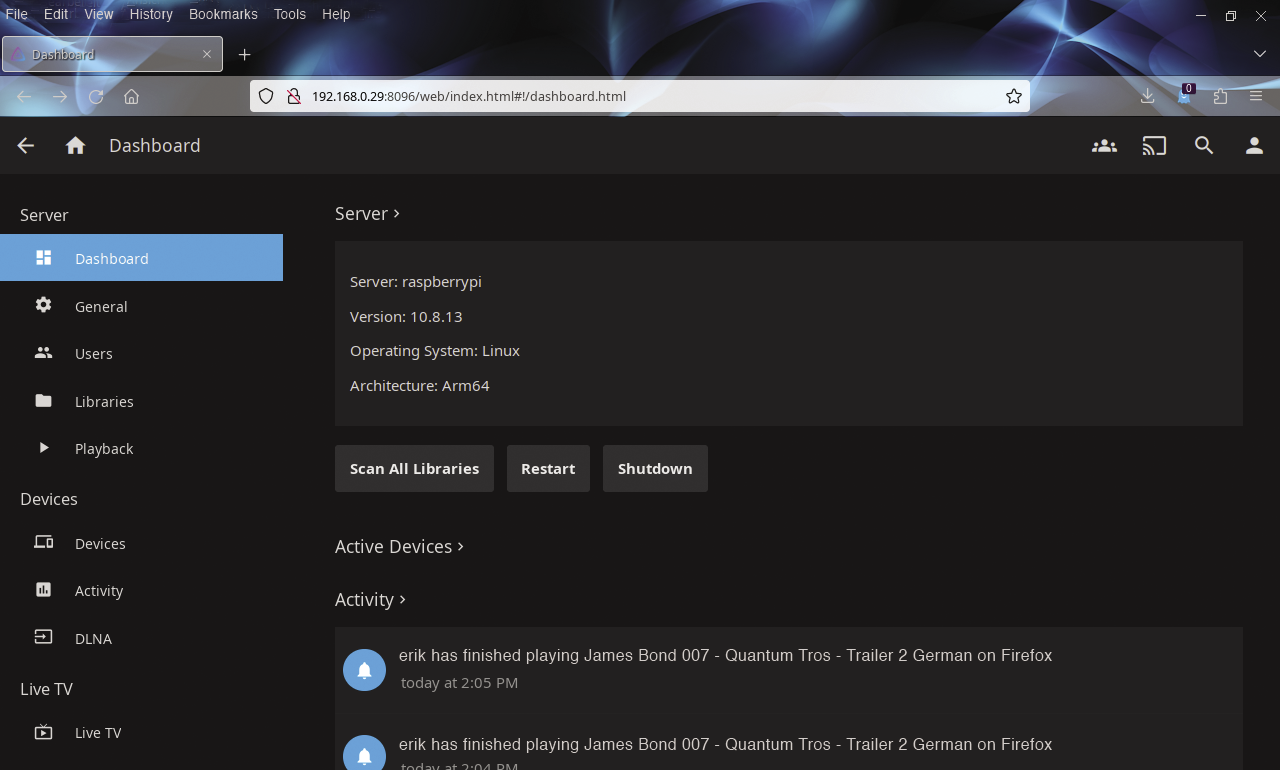
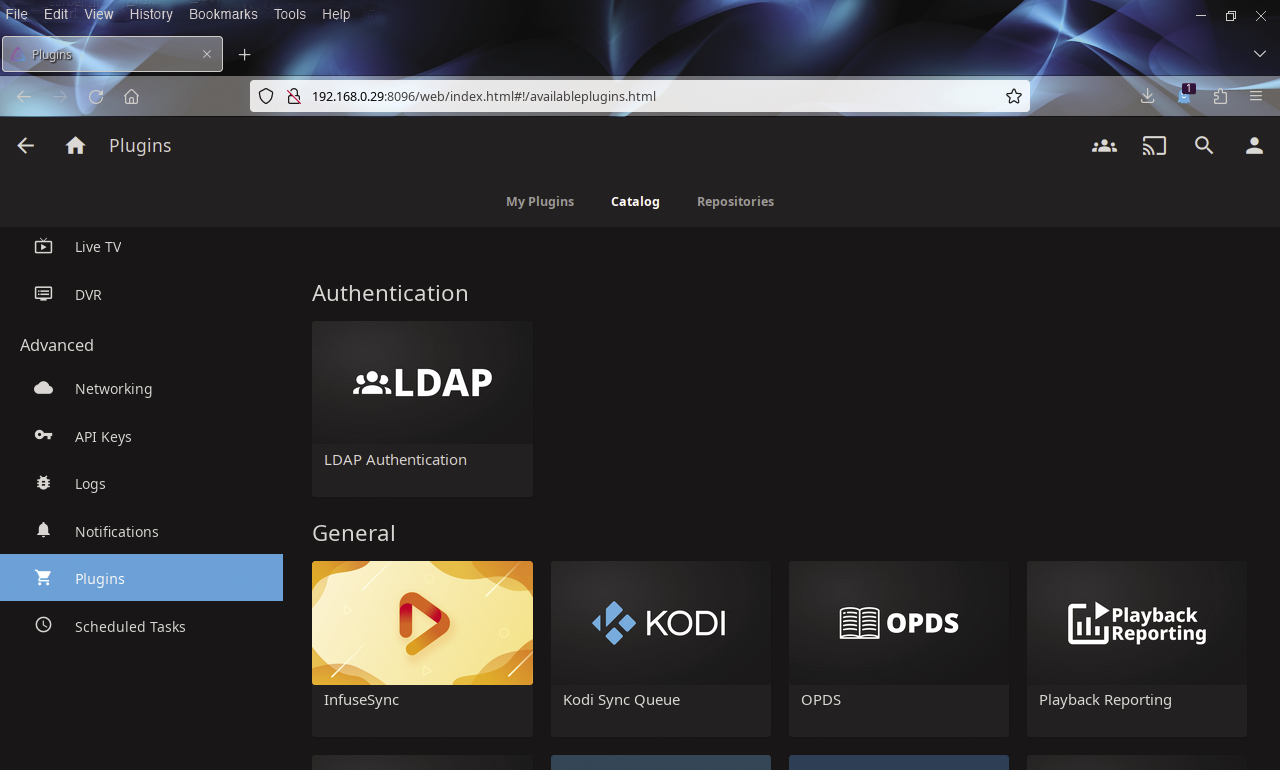
You can create new users and define their rights in the Users dialog (e.g., share only specific libraries with new users), and you can add extensions to your installation in the Plugins menu in the Advanced section. This option lets you integrate more services (e.g., additional metadata sources). Jellyfin comes with a number of plugins already integrated. From the options bar above the plugin display you can show additional plugins and integrate repositories into your installation. Although Jellyfin has nowhere near as many add-on modules as other media players, you can find useful extensions for some important features, such as implementing other metadata providers (Figure 5).
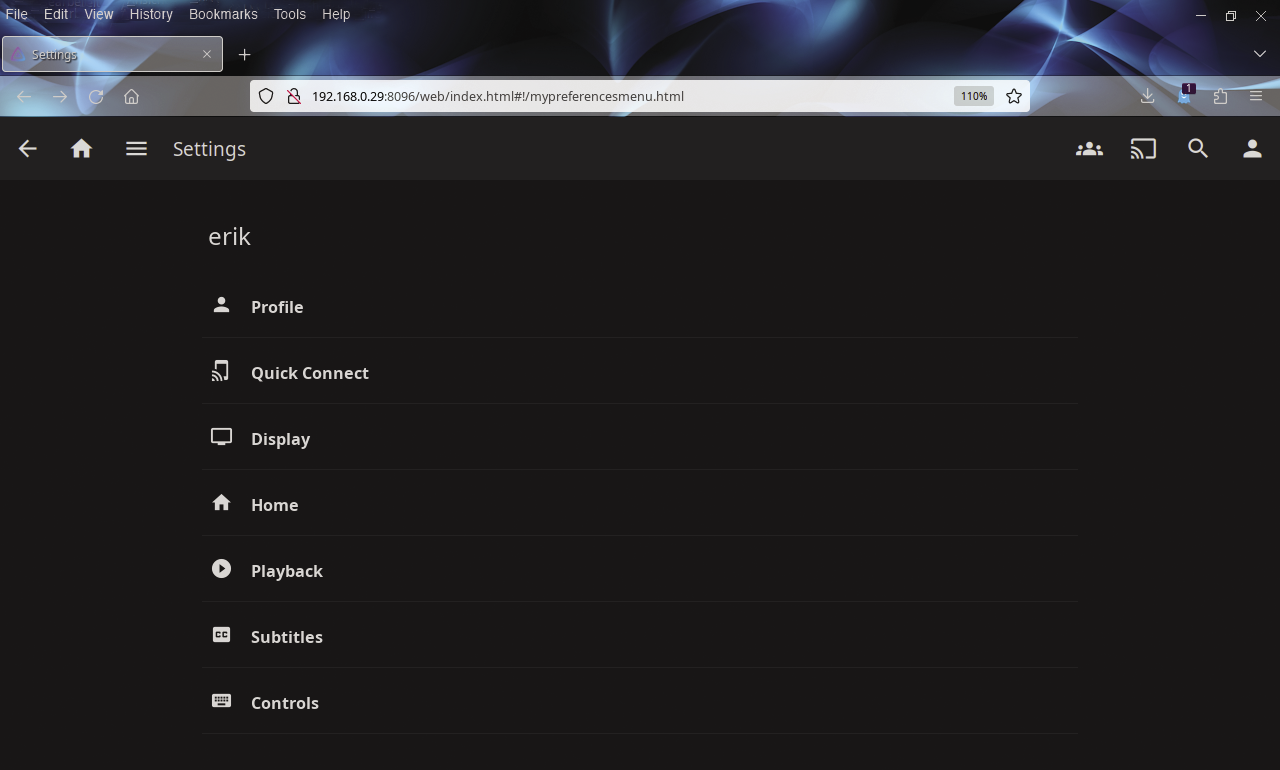
The modifications made in the Dashboard dialog have a global effect on the system (i.e., they apply to all users); options for individual logged-in users are in the Settings dialog, including options for modifying the look of the GUI, changing the user profile, and setting configuration options for content playback (Figure 6).
Permanent
By default, you need to restart the Jellyfin server every time you boot your Raspberry Pi. To do so, simply run the command:
sudo systemctl start jellyfin.service
To automatically launch Jellyfin at boot, type
sudo systemctl enable jellyfin.serviceat the prompt.
Conclusions
The Jellyfin media server lacks nothing compared with other established solutions. Thanks to the server, you can manage and play back your media collection on supported clients across multiple platforms and in the browser. A wide variety of sources can be used. The ability to integrate services that provide metadata gives you additional interesting facts related to your media. Jellyfin is particularly respectful of your privacy and is easy on your wallet: The software is not only free of charge, it avoids collecting personal data. These features are especially attractive for anyone interested in serving up audio and video media.


