
Flexible HiFiBerry replaces old audio amplifier
A HiFiBerry HAT, the matching system, and a Raspberry Pi combine with two old speakers to create a contemporary boombox.
When my trusty audio amplifier bit the dust with crackling, hissing, and sound dropouts, the speakers and CD player from the hi-fi system still worked perfectly. My idea was to replace the broken module with a Raspberry Pi at a reasonable price. If it could receive music on Bluetooth, then all of my family members could feed it from their smartphones without leaving the couch.
A piggyback board from the HiFiBerry series combined with the matching system on a Raspberry Pi replaced this legacy audio amplifier. The system can play music sent over Bluetooth or other ways, and you can control it conveniently in a browser. However, the build and setup come with a few pitfalls, along with a few minor quirks in operation.
A setup like this is also useful for corporate meeting rooms: The presenter streams the audio output from the Raspberry Pi to the speakers, without wiring or even leaving their seat.
Hi-Fi Berries
Of course, the Raspberry Pi only has one analog audio output, and it is not renowned for particularly good musical quality. To the rescue comes the Swiss company Modul 9, which offers various amplifiers for the small-board computer (SMB) under the HiFiBerry brand. You simply connect the small boards to the Raspberry Pi GPIO ports and plug the speaker cables into the sockets provided – that’s all it takes.
The company also provides its own operating system (OS), HiFiBerryOS, which promises easy hardware startup and acts as a small audio center immediately after launching. Among other things, it accepts signals over Bluetooth and AirPlay or from a connected storage device, and you can control it in a browser. Under the hood, a customized Linux system with preconfigured services is at work. Details can be found in the “Tricky Manual Steps” box.
Tricky Manual Steps Raspberry Pi OS comes with all the drivers required for the HiFiBerry products. Instead of HiFiBerryOS, then, you could use Raspberry Pi OS and manually install all the needed services. However, even setting up Bluetooth could cause you to break a sweat and lose half a weekend. If you still want to try it, you will find instructions online.
Although it makes sense to shut down Raspberry Pi OS gracefully, most people simply switch a boombox or hi-fi system on and off with the power switch. For this to work, you need to run the system completely in main memory. However, setting up this kind of configuration is time consuming and complex. Going for HiFiBerryOS will take you to your goal far faster and is easier on your nerves. |
Hardware Zoo
Modul 9 offers several audio amplifiers for different purposes. The MiniAmp for $22 (£20/EUR15) is designed for the small Pi Zero and only has two 3W outputs, which, although enough for small PC speakers, is not good enough for a sound system in your living room.
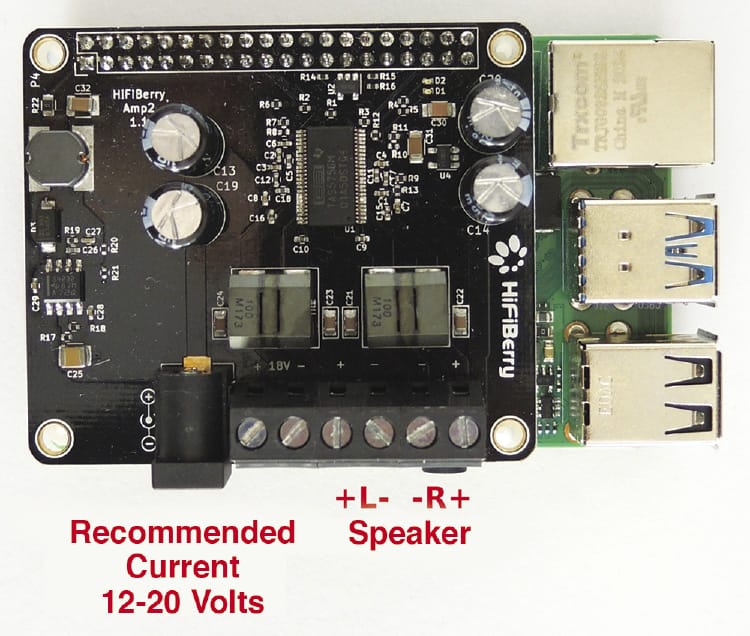
Fortunately, an all-purpose weapon named Amp2 (Figure 1) comes in at $55 (£54/EUR46). The amplifier has two outputs rated at 30W, which might not sound like much at first, but the small circuit board effortlessly managed to delight even my neighbors on the next floor with hard rock.
Both the MiniAmp and the Amp2 only support two speakers at a time. If you want to connect more, you can get the Beocreate 4 Channel Amplifier for $190 (£175/EUR160). As the name suggests, it offers a total of four channels, with two connections even delivering 60W. Additionally, the Beocreate has a digital signal processor with which you can apply various effects to the audio signal in HiFiBerryOS, if required. Unfortunately, the company does not offer a solution for surround sound.
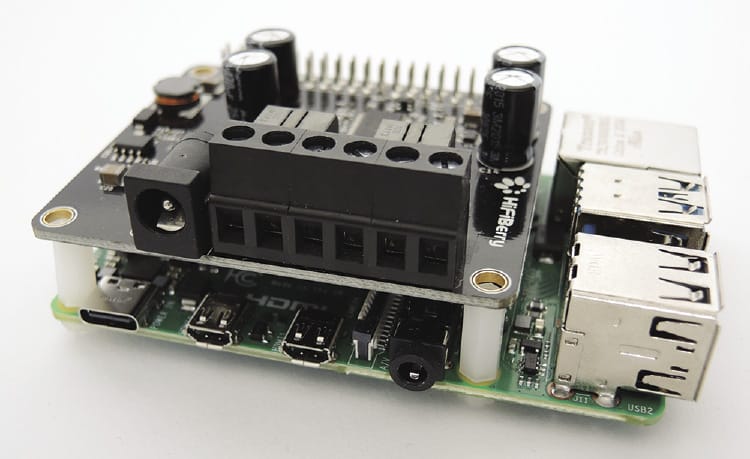
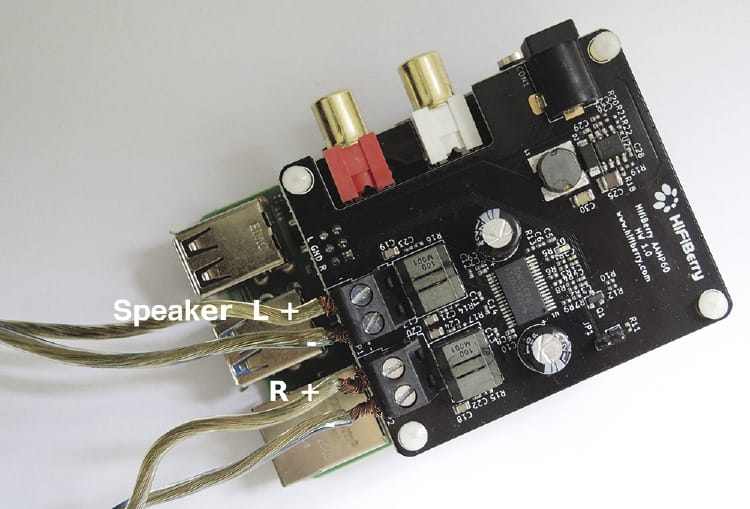
All of these boards come without an audio input, but to continue using an old CD player, you need an analog sound card with input in the HiFiBerry universe. For this project, I went for the DAC+ analog-to-digital (ADC) converter, combined directly with the AAmp60 amplifier. However, unlike the Amp2, it does not have its own sound card, so you will have to piggyback the two HiFiBerry boards on the Raspberry Pi (Figure 2).
The DAC+ ADC in the middle then generates the audio signals, which it passes on to the speakers through the AAmp60 amplifier on top. The pair currently costs $95 (£110/EUR85). The performance of the AAmp60 is the same as that of the Amp2. Unlike the Amp2, however, the AAmp60 needs the DAC+ ADC or another compatible HiFiBerry sound card.
Other Accessories
The AAmp60, Amp2, and Beocreate each have a connector for an external power supply. Four-ohm speakers need a power supply rated at 12V-18V; for 8-ohm speakers, the developers advise you to go for 18V.
According to the data sheet, the Amp2 can handle a maximum of 24V and the AAmp60 20V. If you want to be on the safe side, purchase the respective board along with the matching power supply in the HiFiBerry store. The Amp2 and Beocreate supply the Raspberry Pi with power; the AAmp60 additionally supplies the DAC+ ADC. Consequently, the Raspberry Pi does not need its own power supply.
To play audio material over Bluetooth, you also need a USB dongle. The exceptions here are the Raspberry Pi 3B+ and 4, which come with the chips in place. The 3B model (without a plus sign) has one, but it does not give you a stable Bluetooth connection, say the HiFiBerry developers, which is why HiFiBerryOS ignores the adapter. When buying a new adapter, make sure it is compatible with the Raspberry Pi and Linux.
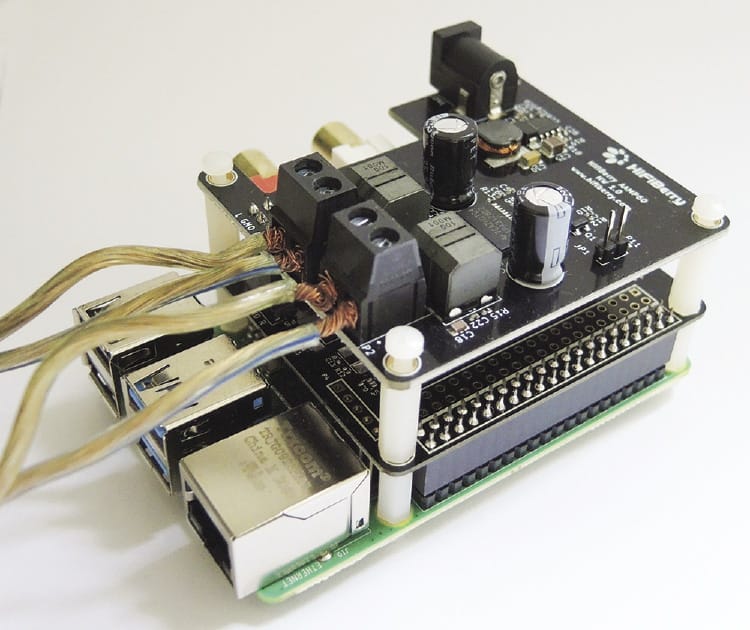
The weight of the boards puts some strain on the GPIO pins, so you should first mount the supplied plastic spacers after unpacking (see the “Cases” box). When connecting the cables for the speakers, pay attention to the correct sockets; their assignments differ between the various HiFiBerry models (Figures 3 and 4).
Cases Because of the height and the position of the connectors, the amplifiers do not fit into standard Raspberry Pi cases. However, at least for the Amp2, Modul 9 offers a compact steel housing, as well as other models, but not all will fit every Raspberry Pi variant. |
Further peripherals for operation are not needed. However, a monitor, keyboard, and mouse will facilitate the initial setup, which can also be handled in a similarly smooth way in the browser. If you connect the Raspberry Pi to the network by cable, the setup is largely automated; otherwise, you can configure over WiFi, for which you need a smartphone or other device that connects to the WiFi network and has a browser.
Software
The system for your Raspberry Pi model is available on the HiFiBerry page. Unpacking the archive on your hard drive gives you an image of about 1GB, which you write to an empty microSD card of at least 4GB. The Etcher program, which the HiFiBerryOS developers also recommend, is an intuitive tool for this task. When done, insert the card into the Raspberry Pi and turn it on.
The first launch takes about three minutes, and the SBC reboots once. If it is connected to the local network, the system automatically retrieves an IP address from the DHCP server (e.g., from a router). Without a network cable, HiFiBerryOS sets up its own WiFi network, to which you connect your smartphone; its name will start with HiFiBerry_Setup_.
If you have a connected screen, keyboard, and mouse, you are taken directly to the user interface. Otherwise, call http://HiFiBerry.local in the browser. If the connection fails, determine the current IP address of the SBC. If in doubt, the user interface of the router should provide the details. You will find the Raspberry Pi listed there as hifiberry. Enter the IP address you determined in this way in the browser. To access the interface with this IP address in the future, you might want to configure your router to always assign the same IP address to the Raspberry Pi.
If you cannot access the user interface after about five minutes, disconnect the computer from the power and then reconnect it. A connected screen might give you clues as to the problem. If the restart attempt fails, make sure the HiFiBerryOS image was written to the medium without errors; the card could be faulty.
Setup
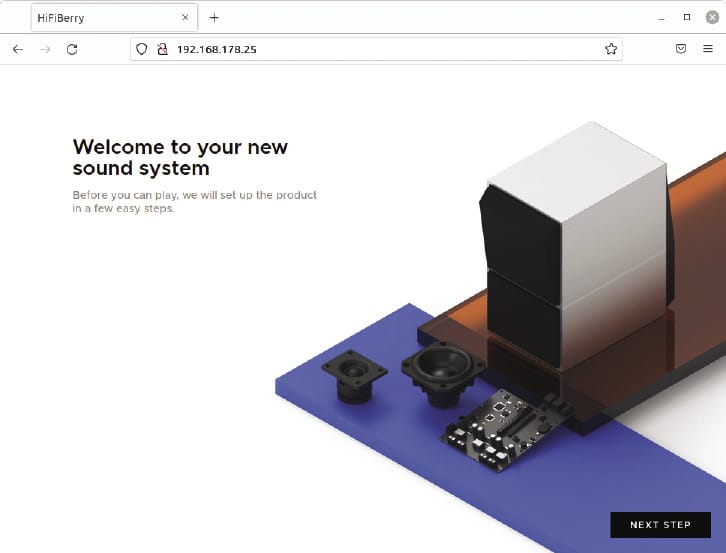
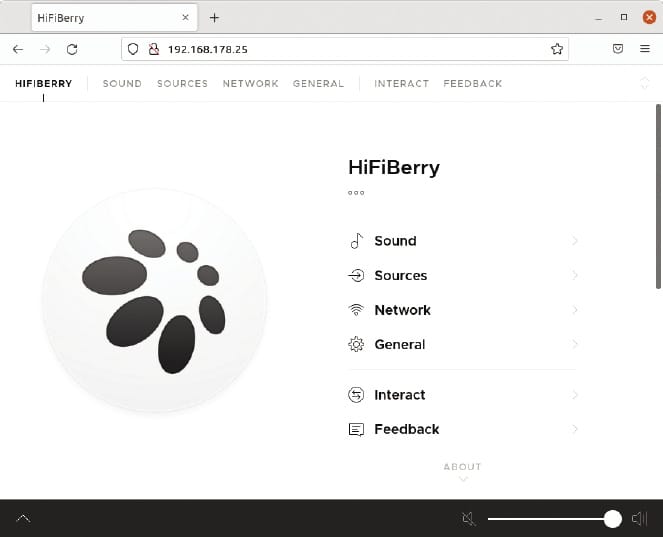
Once the HiFiBerryOS web page (Figure 5) welcomes you, click Next Step and then Finish Setup until you see the interface (Figure 6).
Unless you want to connect a network cable permanently, go to the Network menu item, select a WiFi network under the Wireless tab, and enter the access password. As soon as HiFiBerryOS establishes the connection, shut down the system in General | Power | Shut Down, wait 20 seconds, and then disconnect it from the power supply. You will not need the network cable from now on.
After a reboot, navigate to the very bottom of the interface. The system should show the board it detected; the Amp2 will be listed as something like DAC+/Amp2. However, a combination of the AAmp60 and DAC+ ADC might not be detected correctly; as a result, the audio input does not appear as an Analog Input under Sources.
In this case, shut down HiFiBerryOS again as before. Open the smallest partition on the SD card on your PC. Under Windows you can access the required files directly. In a text editor, add the following line at the end of the config.txt file:
dtoverlay=hifiberry-dacplusadcRestart the Raspberry Pi from the SD card and make sure in the web interface that the HiFiBerry has identified the system correctly.
Bluetooth
Once the system is running, switch to Sources (i.e., audio sources). AirPlay is enabled by default, and smartphones with support for this and other media players should identify the computer as storage and be able to play back music through it.
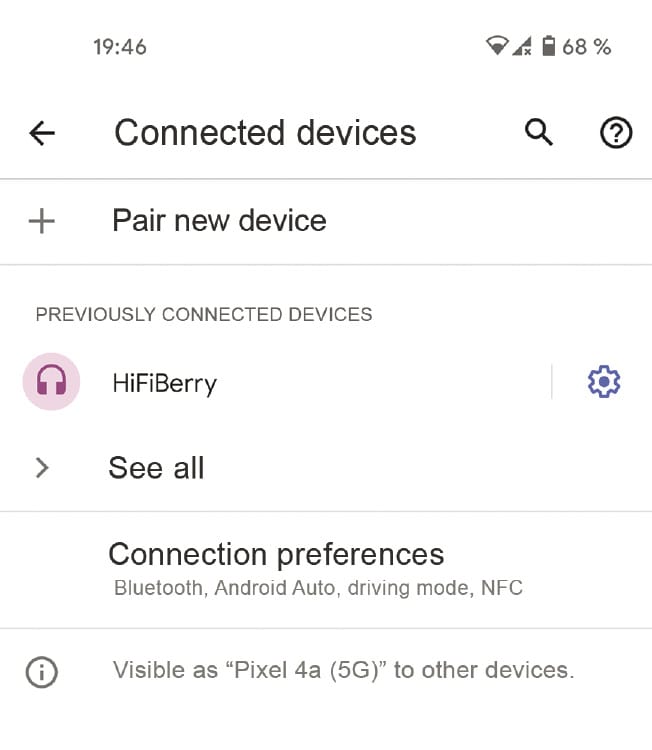
For Bluetooth access, select Bluetooth and then click the black Bluetooth Pairing button. After that, all devices in the vicinity with Bluetooth enabled will recognize the HiFiBerry as a speaker. Pair it with your smartphones, tablets, and other devices – the procedure will differ in each case (Figure 7) – then stop pairing on HiFiBerryOS.
Now you can use these devices to control the volume. To avoid getting on your neighbors’ nerves, you might want to turn the volume down when playing back the first time. During playback, HiFiBerryOS displays the title at the bottom edge, and to the right, you will find the volume control.
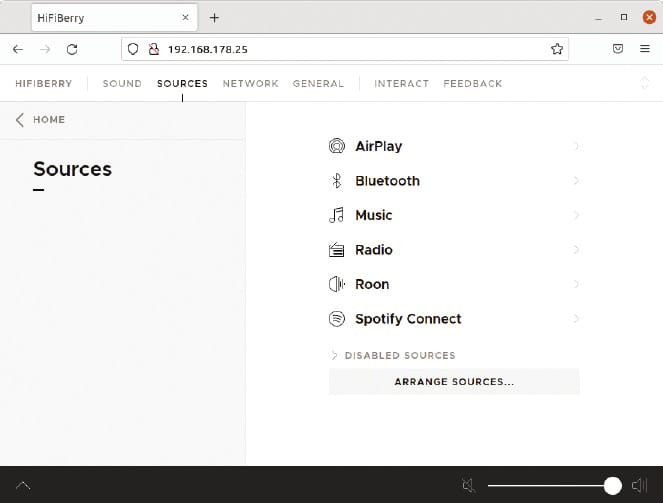
To play back music from the CD player, switch to Sources | Analog Input. This item may be hidden under Disabled Sources (Figure 8). Turn on the input, which will simultaneously turn off the other sources. If you later want the Bluetooth players to provide the sound, disable the audio input and enable the corresponding items under Sources | Bluetooth.
Tricky Stuff
Your Raspberry Pi is now working as a small audio amplifier. In practice, however, you will probably find yourself continually tripping over shortcomings. For example, the Amp2 had massive problems with volume control in a first installation in the test. As soon as the volume exceeded or fell below certain thresholds, audible dropouts occurred in the playback. With the current version of the system in a new installation, everything worked flawlessly. The AAmp60 did not exhibit any of these problems.
In practice, new Bluetooth devices are likely to enter your household from time to time (e.g., if you have visitors). To grant them access to the amplifier, you need to enable the pairing feature in each case. Turning pairing on permanently is not a good idea – or do you really want your neighbor to play back their favorite opera on your speakers?
The user interface also lacks password protection and other security measures. Users on the network can therefore reconfigure the Raspberry Pi or play music without restrictions.
To switch to the CD player, you have to enable the appropriate audio input from the user interface. At the time of writing, HiFiBerryOS does not switch over automatically as soon as a signal is present. Unlike a standalone amplifier, listening pleasure requires a few clicks up front, which, in my experience, is too much for many users.
Shutdown
The intended way to shut down HiFiBerryOS after use is by selecting General | Power | Shut Down. In practice, however, people often simply unplug the power cord or turn off the powerstrip for devices of this type – especially users who find the user interface too complex. In the test, cutting the power did not cause any permanent damage, and the Raspberry Pi repeatedly booted without any problems.
The developers of the HiFiBerryOS also point out in a blog post that the system does not write very much data to the SD card and that damage is very rare. Just in case, I keep a second SD card with a copy of the system next to my DIY boombox.
Modul 9 now also offers a power controller, still in the testing or beta phase, that lets you shut down the Raspberry Pi in a controlled manner at the push of a button.
Conclusions
HiFiBerry amplifiers quickly transform a Raspberry Pi into an oversized boombox, allowing you to extend the service life of your legacy hi-fi components at a low cost. HiFiBerryOS also removes the need to set up Bluetooth and other complex services manually.
The system also offers access to numerous services, including Spotify and various internet radio stations. However, minor quirks make the use of multiple input sources difficult to control.