Three Inexpensive CO2 Sensors Compared
Monitor your indoor air quality with an inexpensive CO2 sensor. We look at three candidates to help you find the best solution.
In the winter, you spend a lot of time indoors, making it important to keep an eye on C02 concentrations. In contrast to sensors for measuring temperature and humidity, CO2 sensors are quite expensive, with prices consistently in the double-digit range. This quickly adds up if you want to monitor more than one room. To make C02 monitoring more budget friendly, this article focuses on three inexpensive solutions: the Winsen MH-Z19C, the ScioSense ENS160, and the Sensirion SCD40.
The latter sensor from brand manufacturers such as Adafruit, Pimoroni, or SparkFun are really expensive, costing between $40 and $80. AliExpress gives you cheaper options with prices below $15, but those come with the added thrill of not knowing whether parts will even work.
Infrared Measurement
The Winsen MH-Z19C (Figure 1) consists of a small box measuring approximately 13.3mm x 26mm x 4.4mm. It measures the CO2 value using the non-dispersive infrared method (NDIR). Two versions of the sensor are available: one with a normal pinout and one with a cable connection and a pin spacing of 1.25mm. If you don’t relish the prospect of crimping connections, you will want to opt for the pinout version. Besides the MH-Z19C, there are other older models on the market, such as the MH-Z19B, MH-Z14, or MH-Z18, which have similar but not identical functions and specifications.
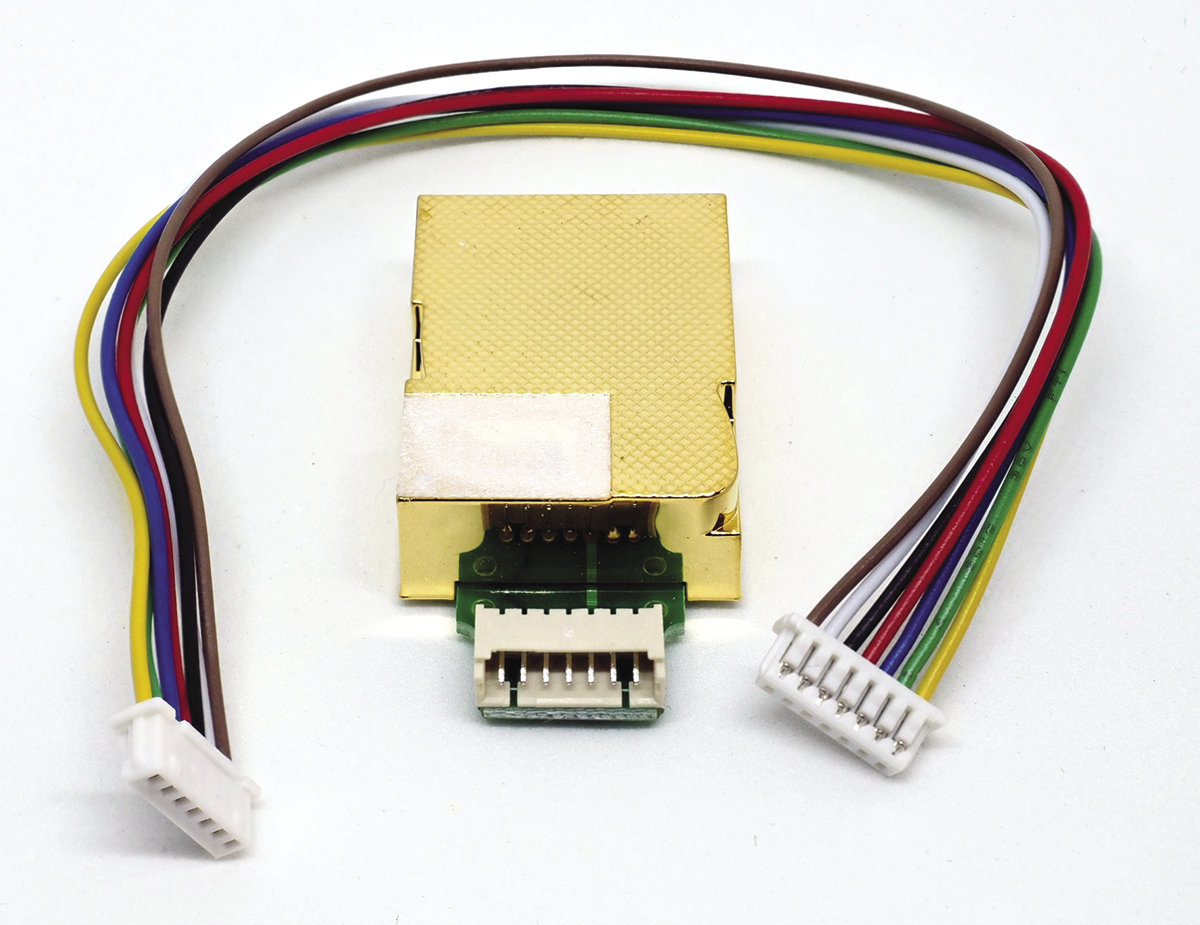
The CO2 level can be read out via PWM, ADC, or UART. The temperature is only available via UART, but that’s irrelevant as these values are useless anyway. All pins have the usual voltage output of 3.3V, while the supply voltage is 5V. The UART is used for configuration tasks. Numerous libraries for all common programming languages are available for this simple interface. In this respect, using the sensor is unproblematic.
In contrast to this, the power supply poses a challenge. According to the manufacturer’s data sheet, the module requires an input voltage of between 4.9V and 5.1V. In other words, you are limited to a maximum deviation of two percent from the 5V setpoint as a safety margin. As a tutorial impressively demonstrates, ensuring the correct voltage is important. The voltage from some popular USB power supplies or from the 5V/VBUS pin of a microcontroller or a Raspberry Pi is neither accurate nor stable enough for this use case.
Buck-boost converters offer a solution (Figure 2): They supply a fixed output voltage over a wide voltage input range. With the low currents (80 mA on average) required by the sensor, the components are not expensive. But two-percent accuracy still remains a challenge.
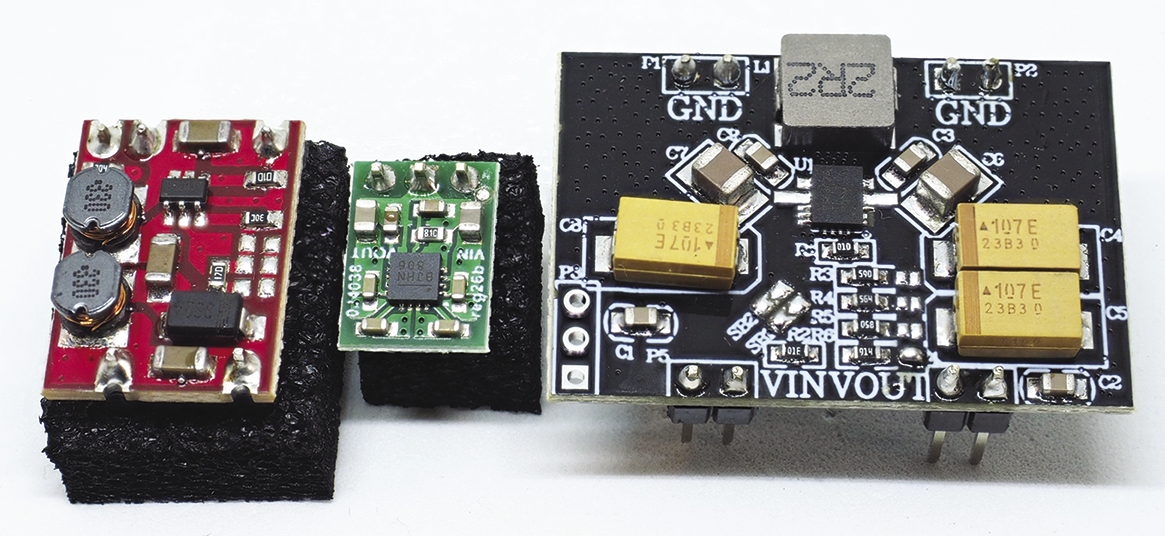
The flashing LEDs on the MH-Z19C are a bit annoying, at least in the dark. The jury is still out on whether the red diode in the measuring chamber is genuinely necessary, but the additional green one is definitely superfluous. Fortunately, it can be masked. Due to its design, the sensor requires a warmup time of just over one minute. Before the warmup, it does not deliver any values, or – if it does – the values are incorrect. There’s a data sheet, but it does not document all of the sensor’s commands. However, resourceful developers have provided a remedy in the form of detailed documentation.
VOC Instead of CO2
While the MH-Z19C measures the CO2 content of the air directly, the ENS160 by ScioSense takes a different tack. It determines an equivalent CO2 (eCO2) value from the concentration of volatile organic compounds (VOC). The logic behind this is simple: People not only produce CO2 when they exhale, but also emit other organic substances in the process. The CO2 value can therefore be determined indirectly from the VOC value.
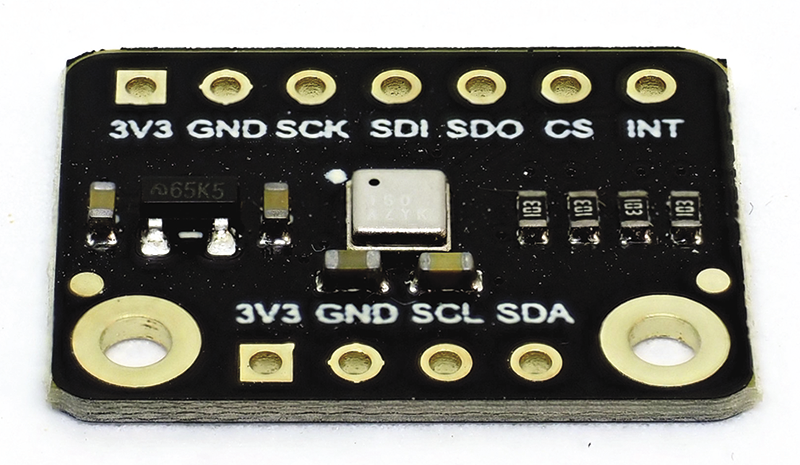
You can control the ENS160 via SPI or I2C (Figure 3). The pin strip at the top is the contact for SPI, while the lower one is for I2C. The I2C pin strip is easier to wire, and most drivers use this protocol. One special feature of the ENS160 is the obligatory initialization time. After the very first time it is turned on, it takes the sensor 48 hours to switch to normal operation.
Small Measuring Chamber
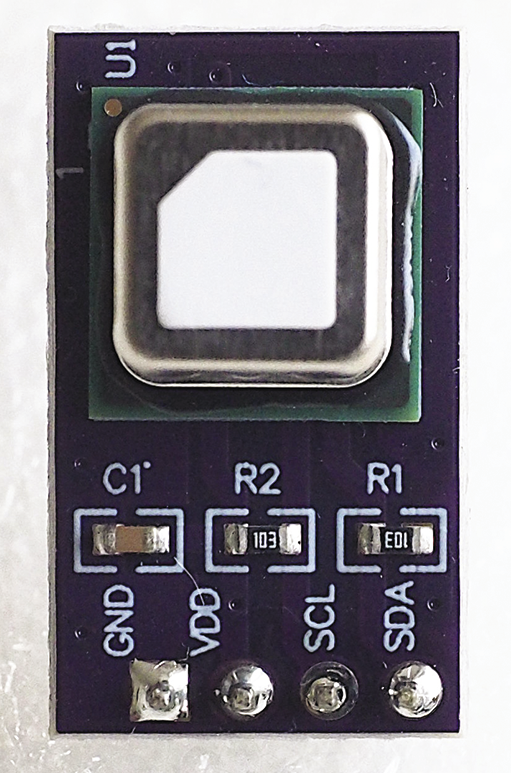
The third candidate, the SCD40 by Switzerland-based Sensirion, uses the NDIR method like the Winsen MH-Z19C, but has its own patented photoacoustic version. This allows for a very compact design (Figure 4). The sensor is controlled via I2C. Sensirion provides excellent documentation and sample code for its sensors on GitHub.
With its minimum measuring interval of five seconds, the SCD40 is a good choice for continuous operation; the first measurement is available after five seconds. In my tests, I found that this value was too high, but later measurements (after 10 seconds) were sufficiently precise. Ten seconds seems to be an acceptable compromise between accuracy and power consumption in battery mode. However, this only applies to the CO2 value. The SCD40 also measures temperature and humidity. For both, it takes around two minutes to achieve stable values, which are then surprisingly accurate.
Test Results
Detailed documentation, data sheets, and examples of wiring and programming are available on the Internet for all three candidates. For this article, I’ve focused on comparing the actual sensors. My collection of sensors includes the SCD40/SCD41 models (four sensors) and the ENS160 (five sensors) from various sources, as well as a single MH-Z19C. Figure 5 shows the measurement results of one candidate from each camp in a direct comparison.
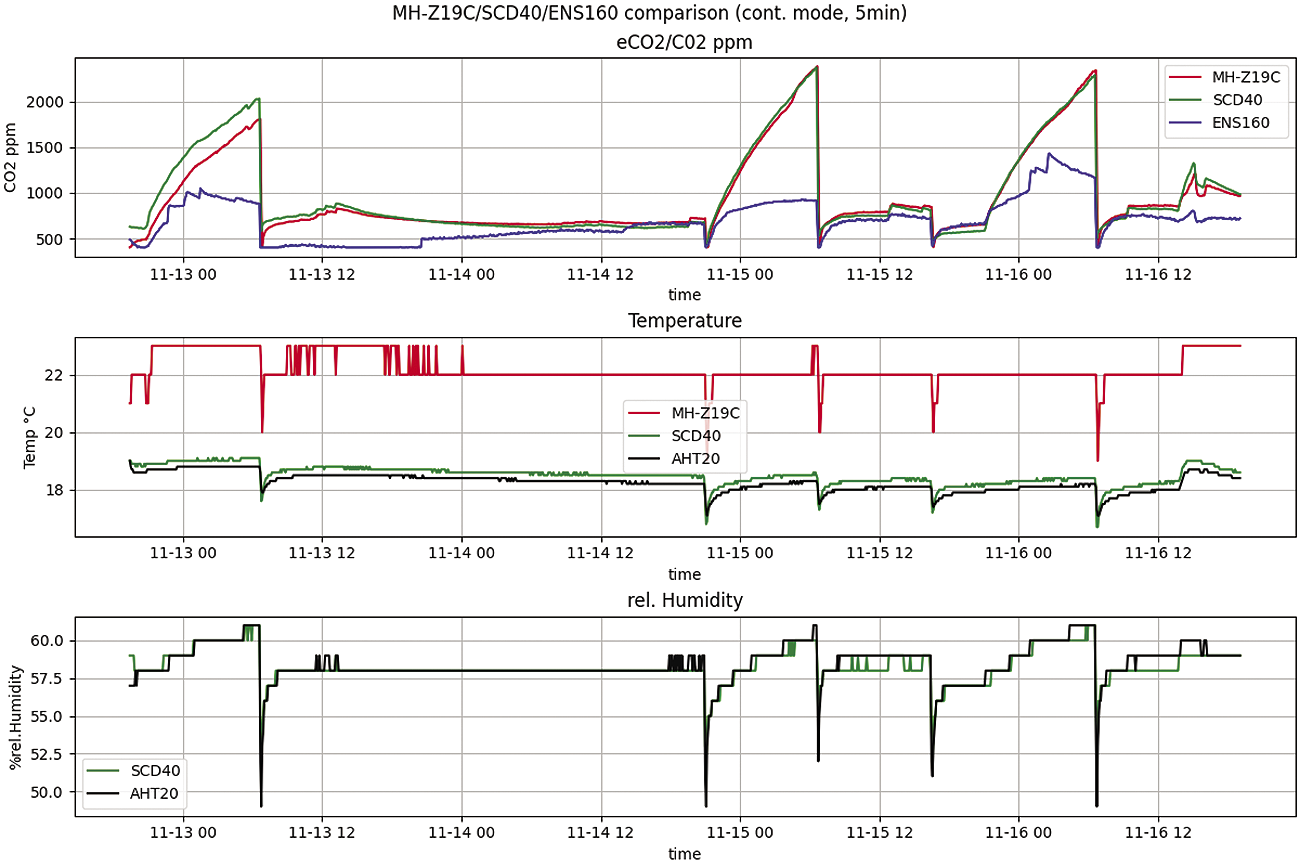
The SCD40 and MH-Z19C are very much alike in terms of CO2 measurement, although accuracy differences are apparent. At 1,000 ppm the deviation is in the order of ±100 ppm, increasing to ±150 ppm at 2,000 ppm. The SCD41 is nominally slightly more accurate, but this does not justify its significantly higher price. The results are also typical for my other SCD40 sensors: I had directly imported two of them from various sellers in China.
The ENS160 was completely out of line in the test. If you wanted to be charitable, you could say that it sort of reflected the tendency of the CO2 content of the air, but the absolute values it delivered were simply unusable. The sample used for the measurement shown in Figure 5 was actually one of the more reliable ones. Other ENS160 sensors that I have used in the past, did not even show the kind of weak correlation with the measured values of the competitor sensors that you can see in the upper graph.
I also used an AHT20 sensor that provided reference measurements for temperature and humidity (Figure 5, center and bottom). While the SCD40 got almost identical values for these parameters, the temperature readings from the MH-Z19C were significantly off.
Conclusions
The Sensirion SCD40 is clearly superior to the Winsen MH-Z19C in terms of function and handling. The ScioSense ENS160 does not deliver what its data sheet promises. In my tests, I was unable to confirm the correlation between VOC and CO2, which is elaborately documented with four graphs on two pages of the data sheet, even though I tried it with five different ENS160 sensors. (This does not say anything about the ENS160’s ability to measure VOC.)
While you may attempt to measure as accurately as possible, bear in mind that CO2 values play more of a qualitative than a quantitative role. Unsurprisingly, there is even a DIN standard for this. It classifies indoor air quality up to 800 ppm CO2 as good, up to 1,000 ppm as medium, up to 1,400 ppm as moderate, and anything above that as poor.


