At Your Command
When programming an Arduino microcontroller board for the first time, most people use the Arduino IDE, a graphical development environment. However, if you prefer the command line, you have a powerful alternative: Arduino CLI.
The Arduino project was initially created in 2005 at the Interaction Design Institute Ivrea in Italy as an educational tool to teach students how to create and program interactive devices with sensors and actuators. Over time, the project expanded beyond its academic origins and became the go-to platform for hobbyists interested in programming microcontroller boards.
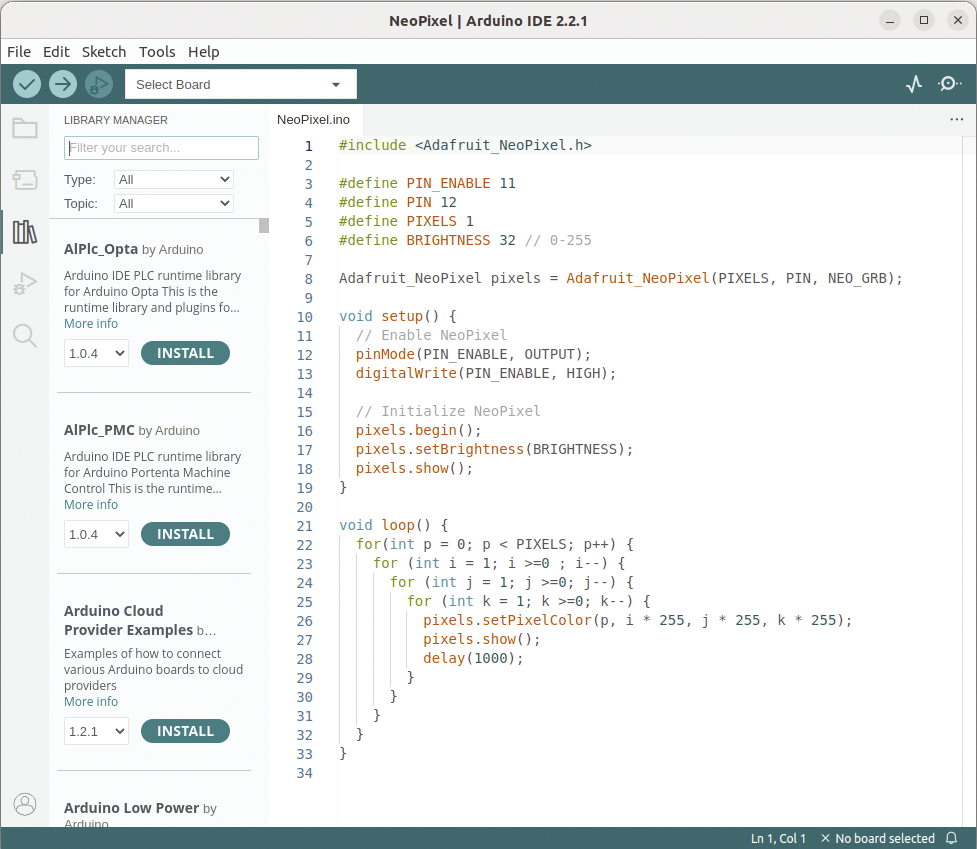
The Arduino graphical integrated development environment (IDE) (Figure 1) has played a significant role in Arduino’s success. It’s easy to learn, without too many bells and whistles, but with all the basics you need. If you’re satisfied with the Arduino IDE or if you use another IDE for Arduino, such as Visual Studio Code with PlatformIO, feel free to continue using them. However, many developers have a command-line-centric workflow because it allows them to work more efficiently, while making it possible to check automatically whether an Arduino sketch still compiles correctly after a code or dependency update.
Fortunately, if you prefer a command-line environment for Arduino development, you have an official solution: Arduino CLI. Although its API is still considered unstable until a 1.0 release, it’s already an integral part of the Arduino IDE. The command-line interface (CLI) is used by the IDE as a back end for tasks such as detecting boards, compiling sketches, uploading firmware to boards, installing cores and libraries, and more.
In this article, I explore how to use Arduino CLI to develop, compile, and upload Arduino sketches entirely from the command line.
Installing Arduino CLI
GitHub has pre-built Linux binaries for all Arduino CLI releases, but the easiest way to install the latest version is with an install script:
$ curl -fsSL https://raw.githubusercontent.com/arduino/arduino-cli/master/install.sh | BINDIR=~/.local/bin shThis script installs the arduino-cli command into the ~/.local/bin directory. Change the BINDIR to any directory you want that’s in your PATH environment variable. At the time of writing this article, this script installed Arduino CLI 0.34.2.
One additional task you need to perform to access your Arduino hardware over USB is to add your user to the dialout group if it is not already a member:
$ sudo usermod -a -G dialout $USERYou can check with the id or groups command. To activate this change, you’ll need to log in again.
If you now run arduino-cli without any parameters, you’ll see a list of supported subcommands (Figure 2). For each subcommand, you can request additional help by running either of the following commands:
arduino-cli subcommand --help
arduino-cli help subcommand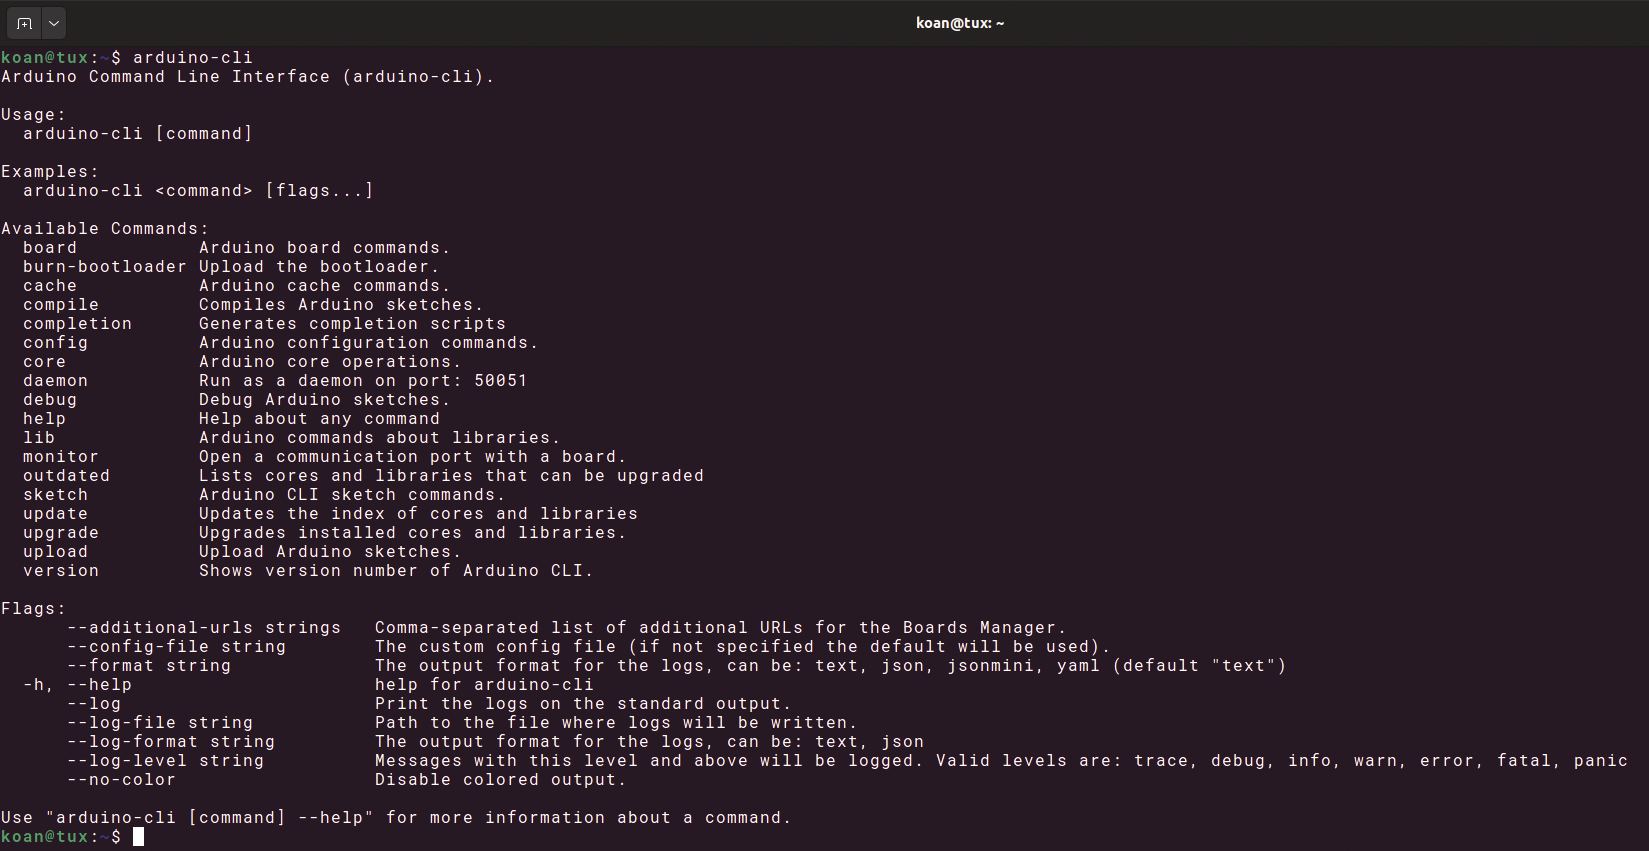
arduino-cli command supports several subcommands for Arduino software development.If you are already somewhat familiar with how Arduino works, you’ll be able to figure out a lot on your own with these commands, because the approach is similar to that of the Arduino IDE, but on the command line.
Configuration
Arduino CLI is configured by command-line flags, environment variables, and a configuration file, in that order of priority. If a configuration option is not set, Arduino CLI uses a default value.
Thanks to these default values and the ability to configure Arduino CLI with command-line flags and environment variables, the command doesn’t strictly require a configuration file to function. However, it’s easier to store some commonly used options in a configuration file, so to begin, I’ll create one with the default settings:
$ arduino-cli config init
Config file written to: /home/koan/.arduino15/arduino-cli.yaml
After creating the configuration file, this command also helpfully shows the file’s location. If you want to view the current configuration, use the command:
$ arduino-cli config dump Listing 1 shows the output of this command for the default configuration. If you need to know the location of the configuration file at a later time, add the --verbose option to the previous command.
Listing 1: Default Configuration
board_manager:
  additional_urls: []
build_cache:
  compilations_before_purge: 10
  ttl: 720h0m0s
daemon:
  port: "50051"
directories:
  data: /home/koan/.arduino15
  downloads: /home/koan/.arduino15/
staging
  user: /home/koan/Arduino
library:
  enable_unsafe_install: false
logging:
  file: ""
  format: text
  level: info
metrics:
  addr: :9090
  enabled: true
output:
  no_color: false
sketch:
  always_export_binaries: false
updater:
  enable_notification: true
Note that the content of the configuration file might differ from the output of the arduino-cli config dump command. If the configuration file doesn’t have a specific configuration option, the command shows its default value instead.
Managing Arduino Cores
After installing Arduino CLI, the next thing you should do is update the local index of available Arduino cores:
$ arduino-cli core update-indexn Arduino core provides support for a specific board family. You can then query the list of installed cores:
$ arduino-cli core listIf you’ve already added cores from the Arduino IDE, you’ll see them listed here as well because the command-line program uses the same installation files located in ~/.arduino15 and ~/Arduino. The command displays the installed and the latest available version of each core, together with its ID and name. For example, the core with ID arduino:avr supports all Arduino boards with an AVR microcontroller, including the Arduino Uno, Mega, Nano, and Duemilanove.
If the command shows that a newer version of a specific core is available, you can upgrade with the command:
$ arduino-cli core upgrade arduino:avrYou can also upgrade all installed cores at once:
$ arduino-cli core upgradeIf you want to find out which core you need for a specific board (e.g., the Arduino Nano 33 IoT), submit the command:
$ arduino-cli board listall nanoListing 2 shows that the Arduino Nano 33 IoT requires the arduino:samd: core. The fully-qualified board name (FQBN) is the unique identifier for each board, including its associated core.
Listing 2: Query Board Core
Board Name          FQBN
Arduino NANO 33 IoT arduino:samd:nano_33_iot
Arduino Nano        arduino:avr:nano
If the previous command doesn’t show the board in which you are interested (e.g., the Arduino Nano ESP32), it means the board is not supported by any of the installed cores. In that case, you need to search for the board in the Board Manager, which will show the core you need:
$ arduino-cli board search nano esp32
Board Name FQBN Platform ID
Arduino Nano ESP32 arduino:esp32
The output reveals that the Nano ESP32 requires the arduino:esp32 core. You can then install this core with the command:
$ arduino-cli core install arduino:esp32After installation, check again whether your board is now recognized (Listing 3).
Listing 3: Recognized Boards
$ arduino‑cli board listall nano
Board Name          FQBN
Arduino NANO 33 IoT arduino:samd:nano_33_iot
Arduino Nano        arduino:avr:nano
Arduino Nano ESP32  arduino:esp32:nano_nora
Creating a New Sketch
Now that your Arduino cores are set up, it’s time to do something with your microcontroller board. Just run the command
$ arduino-cli sketch new Blinkto create a new Arduino sketch named Blink. This command creates a directory named Blink in your current directory, containing a file named Blink.ino, which contains a template for an Arduino sketch with two empty functions, setup() and loop():
void setup() {
}

void loop() {
}
Instead of having to edit this sketch in the Arduino IDE, you can now use your favorite editor (e.g., Vim or Emacs) to make changes. For example, to create a simple blinking light with the built-in LED that most Arduino boards have, enter the Arduino sketch in Listing 4, and save the file when you’re done.
Listing 4: Blink the Built-In LED
01 void setup() {
02   pinMode(LED_BUILTIN, OUTPUT);
03 }
04
05 void loop() {
06   digitalWrite(LED_BUILTIN, HIGH);
07   delay(1000);
08   digitalWrite(LED_BUILTIN, LOW);
09   delay(1000);
10 }
Connecting Your Arduino Board
Now connect your Arduino board to your PC with a USB cable and check whether Arduino CLI recognizes it (Listing 5). You should see the board name listed. If, however, the board name shows up as Unknown, it means Arduino CLI was unable to detect the FQBN and core automatically. In that case, you’ll need to search manually for the FQBN, as explained earlier.
Listing 5: Recognizing an Arduino Board
$ arduino‑cli board list
Port         Protocol Type              Board Name  FQBN            Core
/dev/ttyUSB0 serial Serial Port (USB)   Arduino Uno arduino:avr:uno arduino:avr
Compiling and Uploading a Sketch
Copy the string in the FQBN column of Listing 5 or obtain it from the board search results. To compile your sketch, enter:
$ arduino-cli compile -b arduino:avr:uno BlinkReplace arduino:avr:uno with the FQBN of your board, and Blink with the directory in which your sketch is located.
If your code contains a syntax error, you’ll see an error message. If your code is syntactically correct, the compiled sketch will appear in a temporary directory, and the command will exit without errors.
Next, copy the port from the Port column of Listing 5 (e.g., /dev/ttyUSB0). Use this port when uploading the compiled sketch to your board:
$ arduino-cli upload -p /dev/ttyUSB0 -b arduino:avr:uno BlinkIf everything goes well, you should see a short output message saying New upload port: /dev/ttyUSB0 (serial). If you want to verify that the sketch has been uploaded successfully, you can add the --verbose option to the upload commands, which provides you with the complete output of the uploading tool.
Once the code has been uploaded, the board’s processor will reset, your code will start executing, and the built-in LED will start blinking. You can now disconnect your Arduino board from your PC and power it from another source. Your sketch is stored in the board’s built-in flash memory and will start running every time the Arduino board boots up.
Adding External Cores
Support for additional boards can be added by adding a URL to Arduino’s Board Manager. For example, Earle Philhower maintains an Arduino core for RP2040 boards, including the Raspberry Pi Pico Arduino core, Arduino-Pico. You can add this URL to Arduino CLI’s configuration with the command:
$ arduino-cli config add board_manager.additional_urls https://github.com/earlephilhower/arduino-pico/releases/download/global/package_rp2040_index.jsonAfter adding the URL, you need to update the local index of available Arduino cores:
$ arduino-cli core update-indexIf you now search for available RP2040 boards,
$ arduino-cli board search rp2040you’ll see a much longer list than before, with rp2040:rp2040 as the necessary core, which you can install now:
$ arduino-cli core install rp2040:rp2040Afterward, you can find the possible FQBNs for RP2040 boards with:
$ arduino-cli board listall rp2040For example, to compile the Blink sketch on the Seeed Studio XIAO RP2040 (Figure 3), you need to use its FQBN with the -b flag:
$ arduino-cli compile -b rp2040:rp2040:seeed_xiao_rp2040 Blink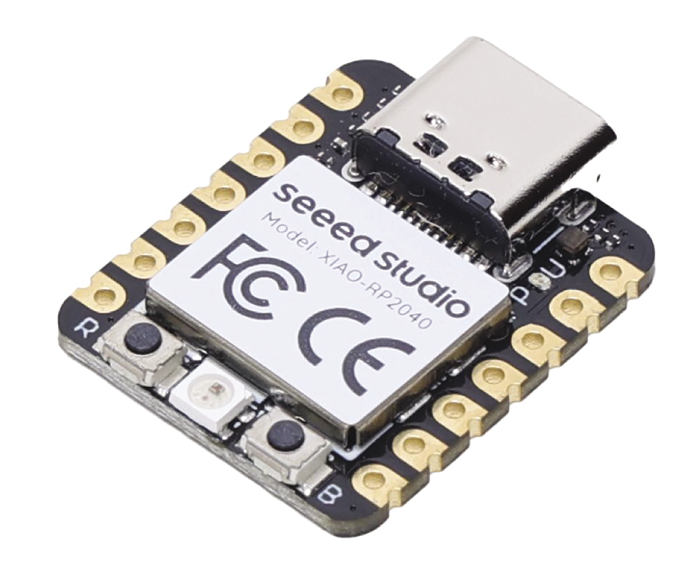
After connecting the XIAO RP2040 board to one of the USB ports on your PC and running arduino-cli board list, the command shows /dev/ttyACM0 as its port, so now upload the compiled sketch:
$ arduino-cli upload -p /dev/ttyACM0 -b rp2040:rp2040:seeed_xiao_rp2040 BlinkAfter the board resets, you should see a red LED blinking next to the USB C connector. However, the green and blue LEDs next to it are still on. To turn them off, you can modify the Blink.ino sketch. I found the pinout on a Seeed Studio wiki page, and Listing 6 shows the modified Arduino sketch to blink the green LED.
Listing 6: Blink XIAO RP2040 LED
01 #define LED_RED 17
02 #define LED_GREEN 16
03 #define LED_BLUE 25
04
05 #define LED LED_GREEN
06
07 void setup() {
08   pinMode(LED_RED, OUTPUT);
09   pinMode(LED_GREEN, OUTPUT);
10   pinMode(LED_BLUE, OUTPUT);
11
12   // The LEDs are connected active low.
13   // Set them to HIGH to turn them off.
14   digitalWrite(LED_RED, HIGH);
15   digitalWrite(LED_GREEN, HIGH);
16   digitalWrite(LED_BLUE, HIGH);
17 }
18
19 void loop() {
20   digitalWrite(LED, LOW);
21   delay(1000);
22   digitalWrite(LED, HIGH);
23   delay(1000);
24 }
In this modified sketch, you first turn off the three user LEDs of the XIAO RP2040 (connected active low) with the HIGH state in the setup() function. Then, in the loop() function, you let one of the LEDs blink – in this case, the green one.
Managing Libraries
In reality, an Arduino sketch is rarely as simple and self-contained as the examples shown here. Most of the time, you’ll need to use one or more libraries to communicate with sensors or other devices you connect to or for specific functionality such as JSON or MQTT.
For example, the XIAO RP2040 board also features a WS2812 RGB LED, commonly known as a NeoPixel, for which you will need a support library to make use of this functionality. To begin, update the index of Arduino libraries:
$ arduino-cli lib update-indexNext, query the list of installed libraries:
$ arduino-cli lib listIf you’ve already installed libraries from the Arduino IDE, you’ll see them listed here. The command will display the installed and the latest available version for each library. If you notice that a newer version of a particular library (e.g., ArduinoJson) is available, you can update it:
$ arduino-cli lib upgrade ArduinoJsonIf you are running the latest version, the Available column doesn’t show a version number.
The command
$ arduino-cli lib upgradeupdates all installed libraries at once.
Adding a NeoPixel Library
Now that you have an updated list of libraries, search for a library in the list of available libraries that allows you to control WS2812 RGB LEDs. Use neopixel as the search word:
$ arduino-cli lib search neopixelThis command displays a lot of information for each library, such as the author, maintainer, project, supported architectures, and available versions (Figure 4). Choose the library that best suits your needs. For example, choose the Adafruit NeoPixel library and install it (the library name can be found on one of the lines that starts with Name:):
$ arduino-cli lib install "Adafruit NeoPixel"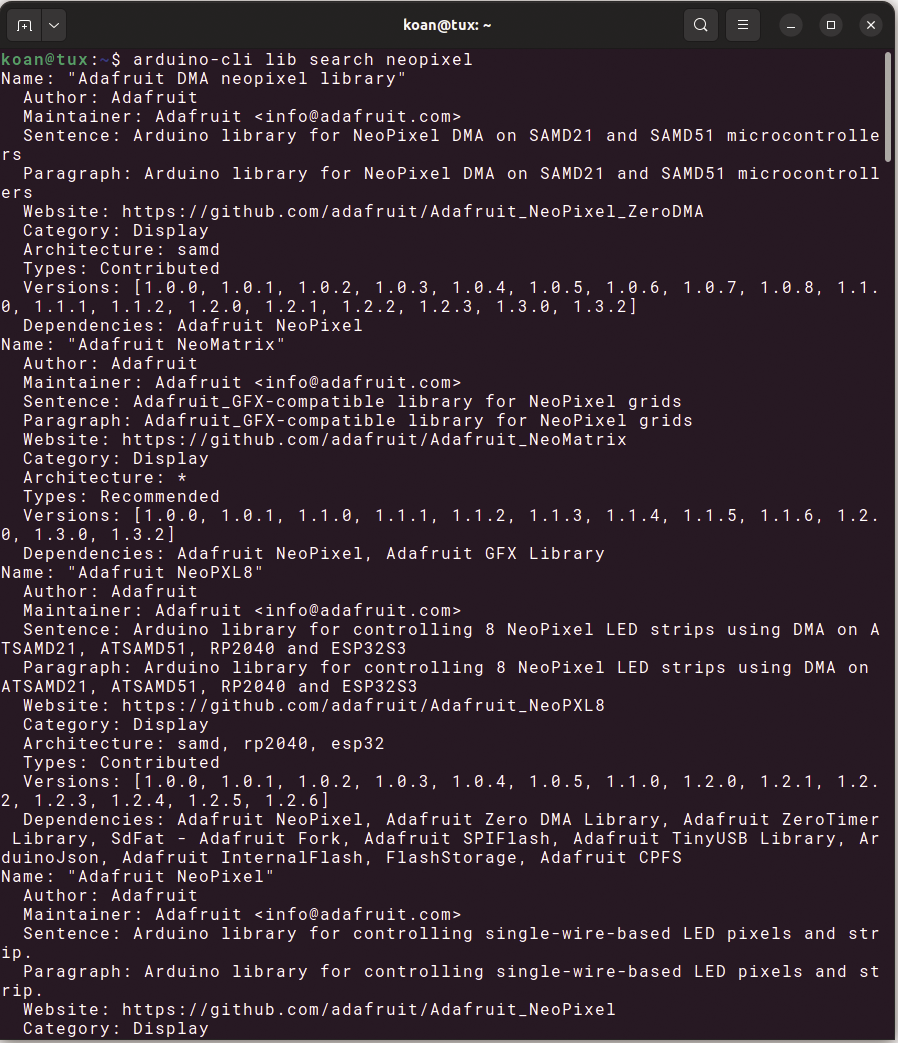
arduino-cli.Note that many libraries come with example sketches. You can find their location with the command
$ arduino-cli lib examples "Adafruit NeoPixel"Now that the library is installed, you can use it in your Arduino sketches.
Controlling the NeoPixel
To begin, create a new Arduino sketch:
$ arduino-cli sketch new NeoPixelIn the NeoPixel/NeoPixel.ino file, create the code shown in Listing 7 to test the NeoPixel on the Seeed Studio XIAO RP2040.
Listing 7: Test NeoPixel on XIAO RP2040
01 #include
02
03 #define PIXELS 1
04 #define BRIGHTNESS 32 // 0‑255
05 #define PIN 12
06 #define PIN_ENABLE 11
07
08 Adafruit_NeoPixel pixels = Adafruit_NeoPixel(PIXELS, PIN, NEO_GRB);
09
10 void setup() {
11   // Enable NeoPixel
12   pinMode(PIN_ENABLE, OUTPUT);
13   digitalWrite(PIN_ENABLE, HIGH);
14
15   // Initialize NeoPixel
16   pixels.begin();
17   pixels.setBrightness(BRIGHTNESS);
18   pixels.show();
19 }
20
21 void loop() {
22   for(int p = 0; p < PIXELS; p++) {
23     for (int i = 1; i >=0 ; i‑‑) {
24       for (int j = 1; j >=0; j‑‑) {
25         for (int k = 1; k >=0; k‑‑) {
26           pixels.setPixelColor(p, i * 255, j * 255, k * 255);
27           pixels.show();
28           delay(1000);
29         }
30       }
31     }
32   }
33 }
On the first line, you include the library installed earlier, before defining the number of pixels on the NeoPixel. Because the Seeed Studio XIAO RP2040 only has one built-in WS2812 RGB LED, you set PIXELS to 1. The brightness is set quite low because the LEDs are blindingly bright. Next, define the GPIO pin to which the NeoPixel is connected, as well as an enable pin, which is needed on the XIAO RP2040 to turn on the NeoPixel. After defining these macros, you create a pixels object with the number of pixels, the pin, and the LED type as arguments.
In the setup() function, you enable the NeoPixel and initialize it, setting its brightness. The loop function has a couple of nested loops to iterate through all the pixels (so this code also works if you connect a NeoPixel LED strip or ring) and RGB (red, green, blue) components. Basically, each pixel gets eight colors in a row with a delay of a second in between, after which the pixel is off (all RGB components are 0 at the end of the loop) and the next pixel takes its turn. It’s a simple way to test whether all your pixels are working.
Finally, compile and upload the sketch to your board with the same commands you learned earlier. If everything goes well, you should now see the NeoPixel on your board cycling through different colors.
Arduino CLI in GitHub Actions
If you have a GitHub repository with Arduino sketches, you can use the arduino/compile-sketches GitHub action to check whether the sketches compile correctly. Under the hood, this GitHub action runs Arduino CLI, installing the necessary cores and libraries that you specify, which allows you to check, for every commit, whether the sketches still compile against the latest cores and libraries for all the boards you specify. Another useful tool is Arduino Lint, which checks for common problems in Arduino projects. You can also run this tool automatically as part of a GitHub workflow with the arduino/arduino-lint-action.
Conclusion
In this article, I’ve explored the main features and tasks you can perform with Arduino CLI. The command provides many other options to customize its behavior. Be sure to check the output of
arduino-cli subcommand --helpfor more information about available options. The -v (verbose) option is especially useful for troubleshooting, because it provides more detailed information. Once you get the hang of using Arduino CLI, you might find it difficult to go back to the Arduino IDE!