Bring back old game machines with MiSTer FPGA
When it comes to reviving old games, FPGAs offer a more authentic experience than software emulators. The MiSTer FPGA delivers one of the best solutions for retro gaming.
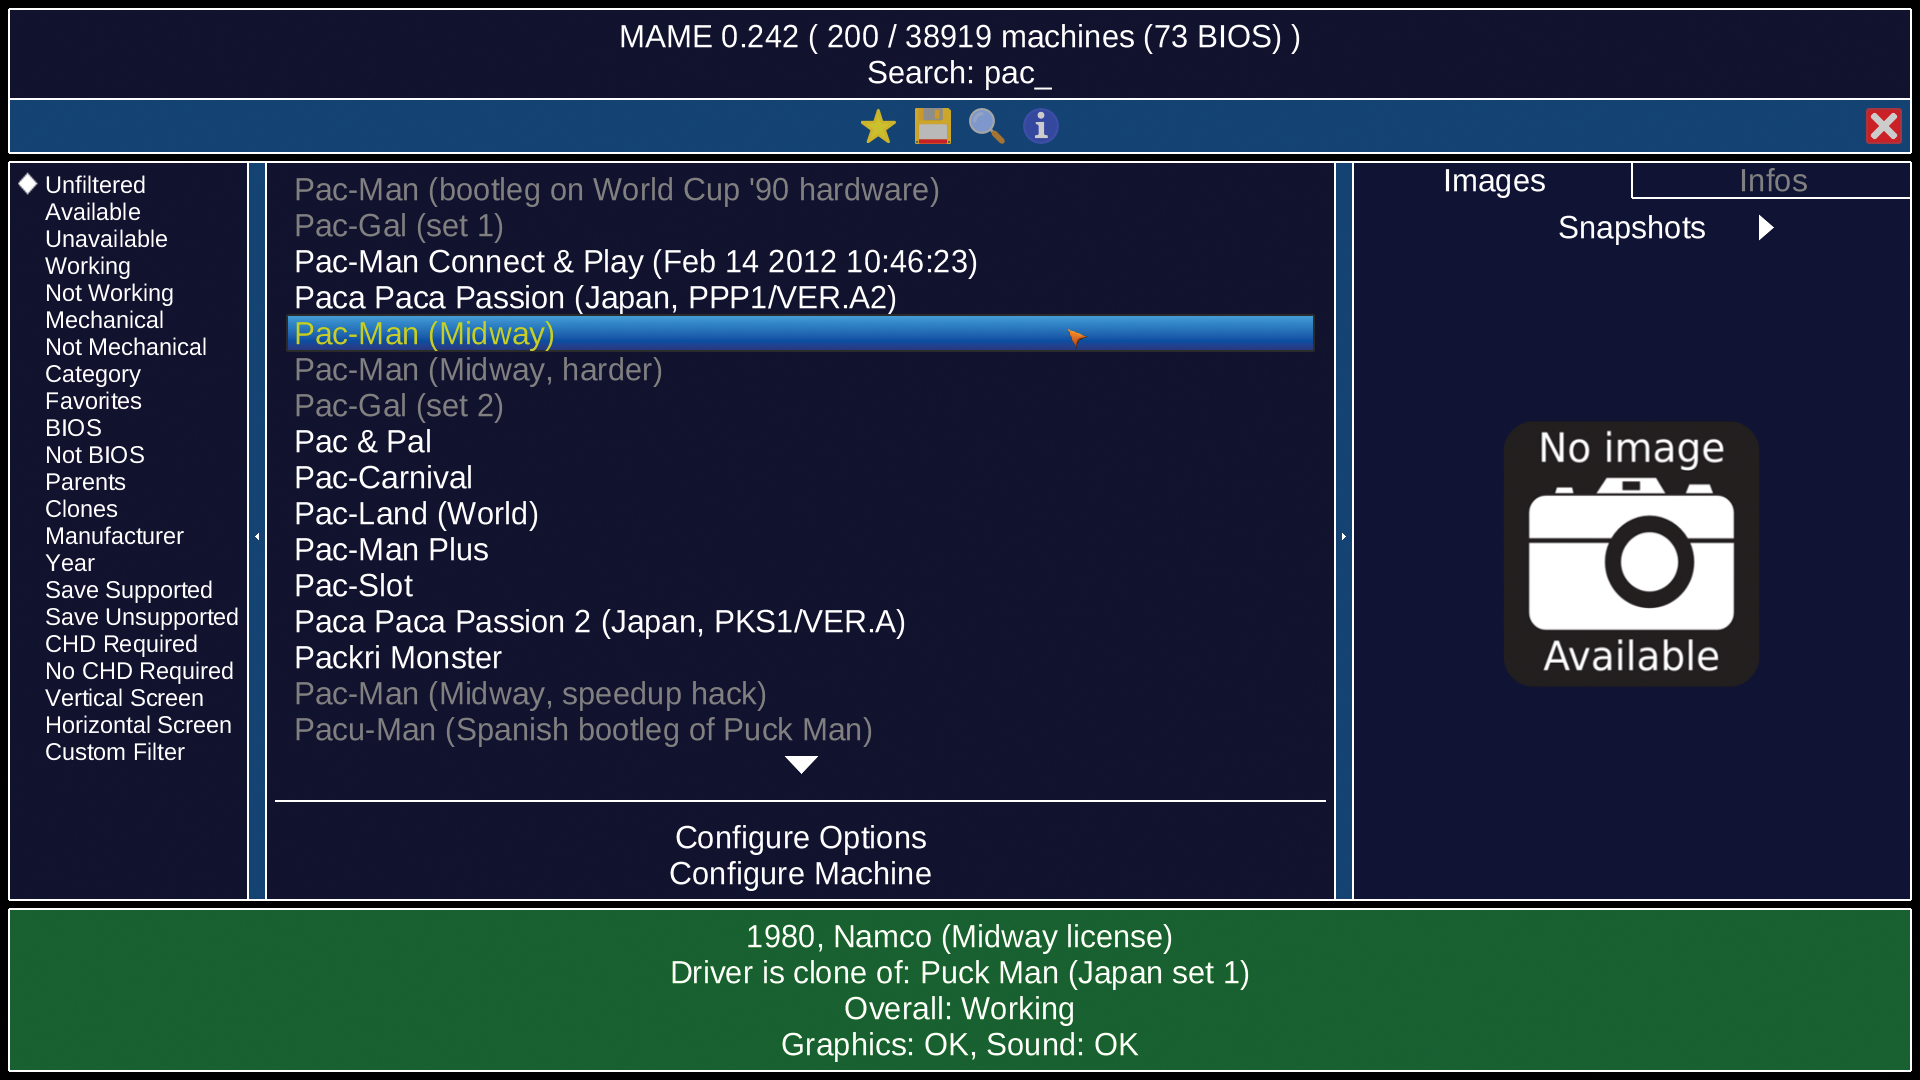
If you like old arcade machines, you will be familiar with the MAME project. Originally, MAME stood for Multiple Arcade Machine Emulator, but today it does much more. MAME is a collection of software emulators for classic arcade machines, home computers, and game consoles. To play games on MAME, you will need to download individual game files or a 60GB collection from the Internet Archive. Then you can launch games from a GUI that lets you search by name, publication year, and other criteria (Figure 1). You will find more than 30,000 titles that run on MAME by searching the Arcade Database.
While MAME has attracted many users and developers thanks to its availability on Windows, Linux, macOS, and other systems, some classic gamers notice subtle differences between the original machines and MAME’s software emulations: Timing is sometimes wrong, games look different on a modern screen, and the emulation layer leads to higher latency.
In a complex machine such as an arcade game or the Commodore 64 (C64), many components work independently. The operating system makes the processor talk to a hard disk controller and asks it to read from a disk, the CPU does other things, and the disk controller works autonomously, all while the sound and graphics chips are simultaneously active. A purely software-based emulator such as MAME will have to simulate all these parallel activities for a successful emulation.
As an alternative, a field programmable gate array (FPGA) can emulate hardware, making it easier to recreate an old machine’s precise behavior and timing. When you add a VGA port and connect an old cathode-ray tube (CRT), the look and feel closely matches the original experience. The MiSTer FPGA offers one of the best solutions for emulating your favorite retro games.
FPGA
An FPGA is a user-configurable chip that exactly replicates the functionality of classic processors, I/O devices, and other chips in hardware. In very simplified terms, this corresponds to emulation at the hardware level; there are no restrictions here as far as parallel processing on multiple components is concerned. If the FPGA chip is large enough, developers can put various CPUs, controllers, and other components on the same chip and run them just like the originals. Modern FPGAs allow even more complexity: They can contain both classic processors (often some kind of ARM core) and configurable logical elements (which also may play the role of memory cells).
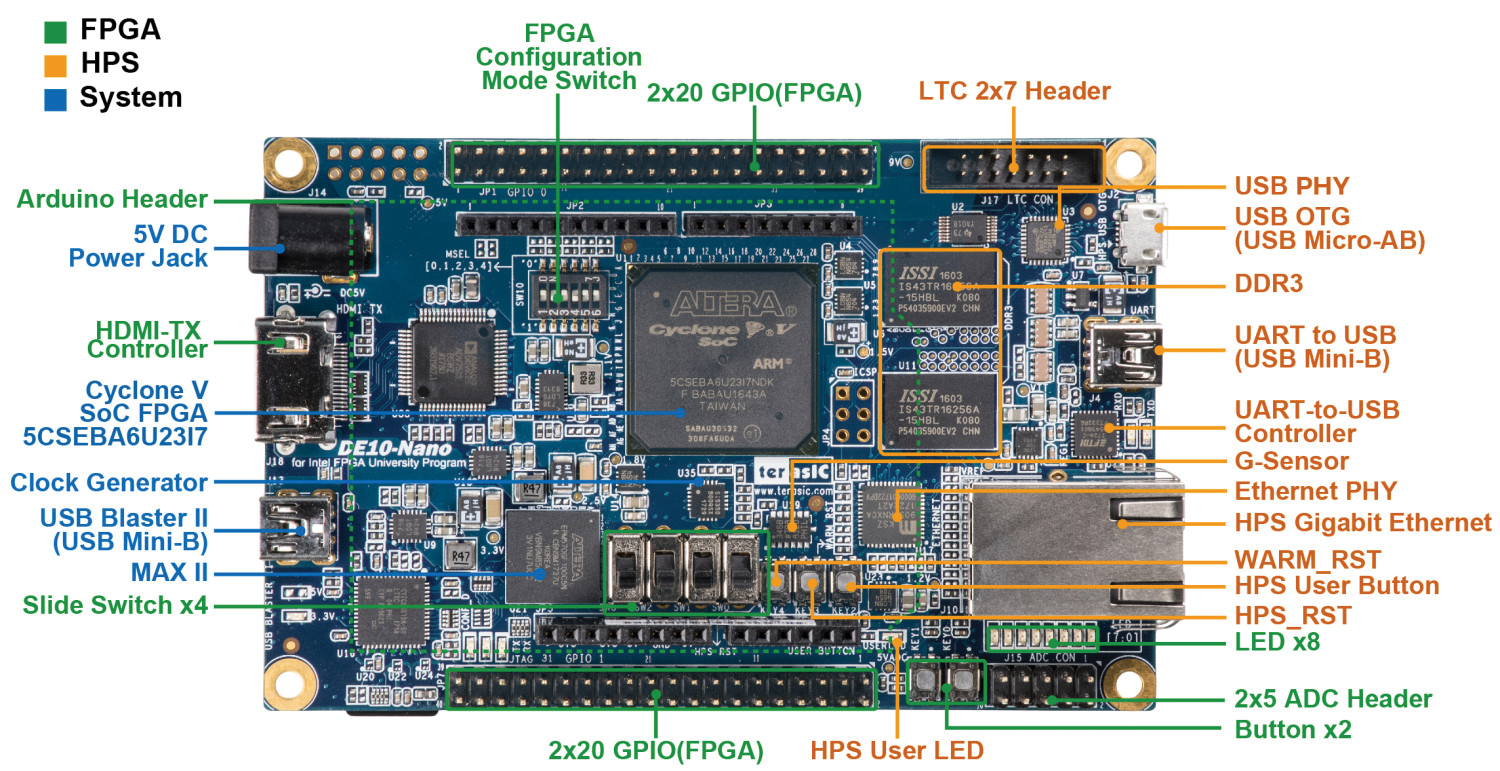
In order to use an FPGA chip, it needs to be put on a board, just like a normal CPU. The board will then host further components (e.g., generic I/O pins or specialized connectors for PS/2 or USB keyboards, mice, and gamepads; Ethernet; and an interface that lets you reprogram the FPGA chip). FPGA systems come in all sizes and prices. In this article, we’ll look at the MiSTer FPGA project that uses a Terasic DE10-Nano development board. This board (Figure 2) hosts an Intel Cyclone V SoC FPGA chip that also integrates a dual-core Cortex-A9 ARMv7 core running Linux.
MiST can be seen as MiSTer FPGA’s predecessor, though MiST still has some ongoing development. The name “MiST” is a combination of “Mi” (from the Commodore Amiga) and “ST” (from the Atari ST). The original goal was to build a good hardware replacement for those two machines, both of which used the Motorola 68000 processor. The MiST has VGA, USB, and DB9 joystick ports, with some versions featuring additional MIDI ports (in/out), which makes sense because the MIDI ports were heavily used by Amiga and ST software. MiST can also emulate other computers; in early 2023, there were 44 supported machines.
When Alexey “Sorgelig” Melnikov started the MiSTer FPGA project, he ported the MiST code to the DE10-Nano because that platform had an HDMI port to which he could connect modern displays instead of fiddling with the MiST board’s analog output signals and various external converters. The Linux system that runs on the ARM cores makes management of the MiSTer easy: It can automatically update itself, and it can open Secure Shell (SSH) and SMB ports so that you can log in from a regular computer to perform some administrative tasks.
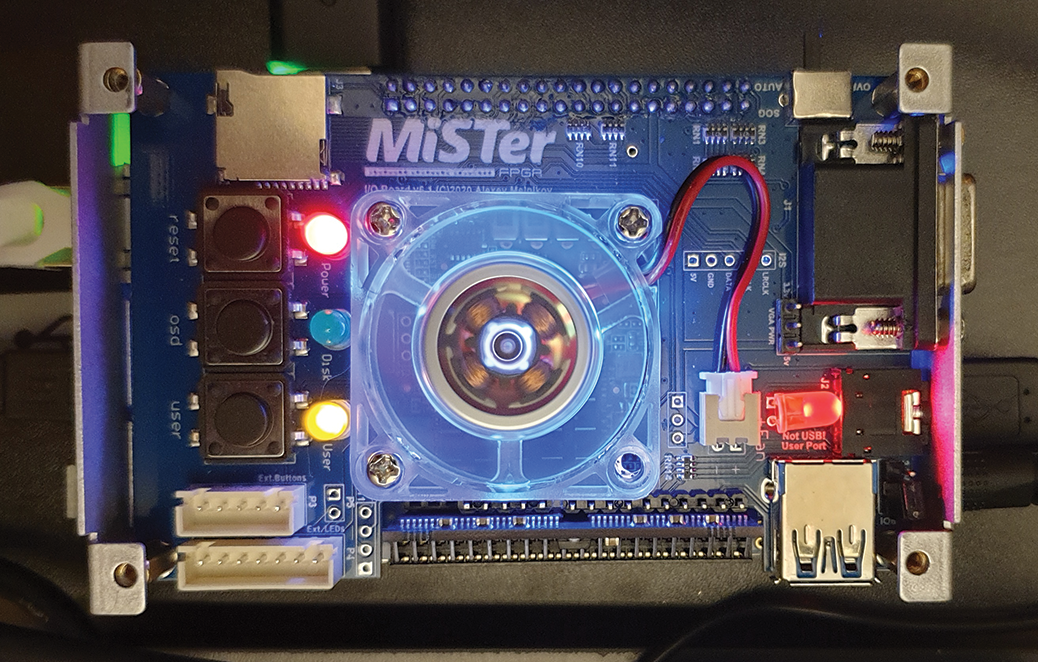
A few companies have specialized in building MiSTer FPGA systems that add I/O boards and custom cases. As a MiSTer setup for this article, I’ve been using the One4All MiSTer Original System from German dealer Andy Brenner (Figure 3). MiSTer systems have become quite expensive over the past few years, as chip shortages have also hurt this niche (see the “Availability and Alternatives” box).

The MiSTer component that is hard to get is the central board, the Terasic DE10-Nano. Many MiSTer shops do not offer it right now, while others have waiting times of several weeks to months. When preparing this article, I found only two offers of fully assembled MiSTer machines with a promise of quick delivery (one for EUR500 and one for EUR550). In the US, I found a model for $600, but it was sold out (as were MiSTers in all the other US shops I tried in April 2023).
If you want to try out an FPGA system but find that MiSTer systems are too expensive or not available in your area, there are some alternatives with similar properties. However, none are compatible with the MiSTer: If it does not include a DE10-Nano board, it will not run MiSTer.
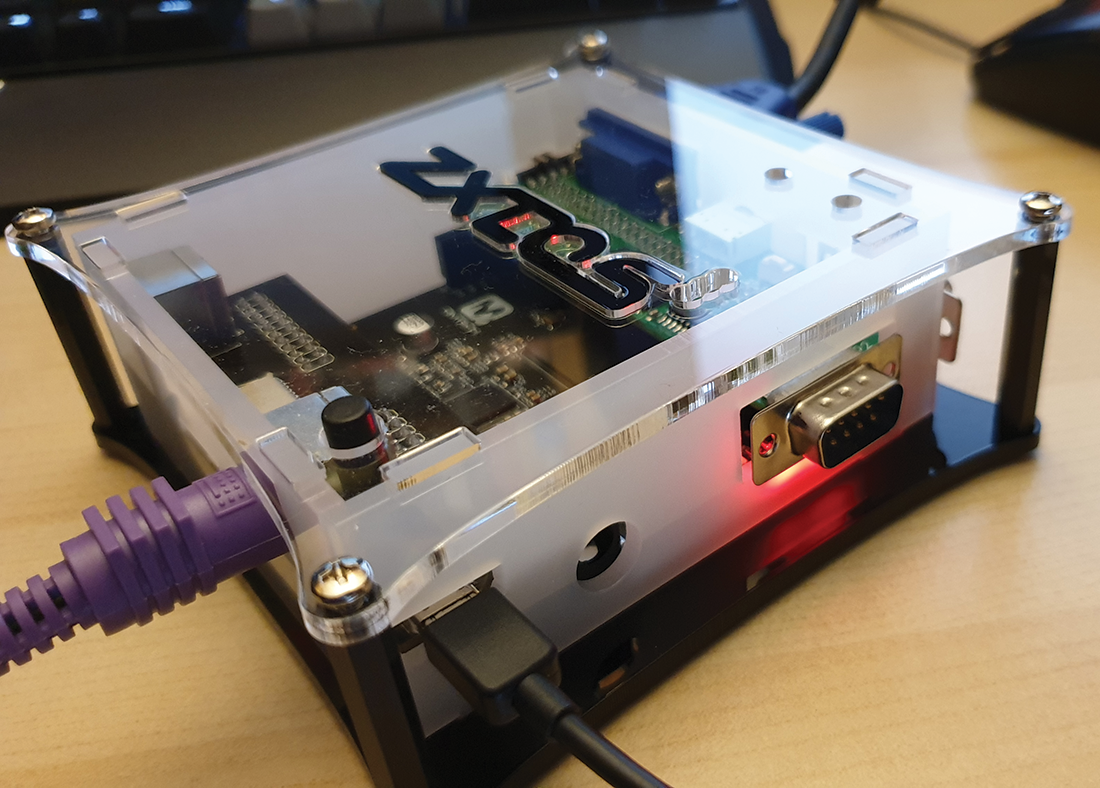
The older MiST system is still available from Lotharek. Antonio Villena offers various systems primarily focused on the Sinclair ZX Spectrum, which can also emulate other computers, including the ZXUNO+ (no longer available) and ZXDOS systems (Figure 4). Also, if you manage to find a DE10-Nano board, you can buy the other components from various MiSTer dealers.
Terminology
You will hear a lot of talk about “cores,” “roms,” and “games” in the FPGA gaming world. Here’s what those terms mean.
You program an FPGA with a core. After loading a core, the FPGA can start its work and execute software. If you want to play a C64 game on the MiSTer, then the C64 core would make the machine act like C64 hardware: You get a MOS 6510 processor, 64KB of memory, on-board graphics and sound chips, and the whole network of connections between those components.
Roms contain the software that’s built into a computer by default. In many cases, this is literally a dump of a read-only memory (ROM) chip that sits on the computer’s board. In the case of the C64, you get two such ROM images: one for the “kernal” (which is really called kernal and not kernel in the Commodore world) and one for the BASIC interpreter. When you add the required roms to a core, you have a working system – just like what came in the box when you bought a C64 back in the day. It will turn on, which is often enough to start using it.
Games can be disk, tape, or cartridge images or memory snapshots that contain software for a core/rom combination. In the C64 example, a game could be an image of a floppy disk that is meant to be read via a Commodore 1541 floppy drive. However, for a classic arcade machine, there are no disk or floppy drives, and the game code is in a ROM chip.
The RetroArch emulator front end uses similar terms: A core is a library that contains code for an emulator. For example, RetroArch also has a core that emulates a C64, though we’re talking about software emulation here. However, a RetroArch “rom” is a game file. Also, in some of the game collections available on the Internet Archive, disk images are called roms. It is easy to get confused.
Back to MiSTer FPGA: When I discuss the automatic download feature for cores and roms later, I mean that you get cores and roms for the arcade machines to make them playable. In the case of gaming consoles or home computers, you only get the machines – you need to provide game disk or tape images from different sources.
Initial Setup
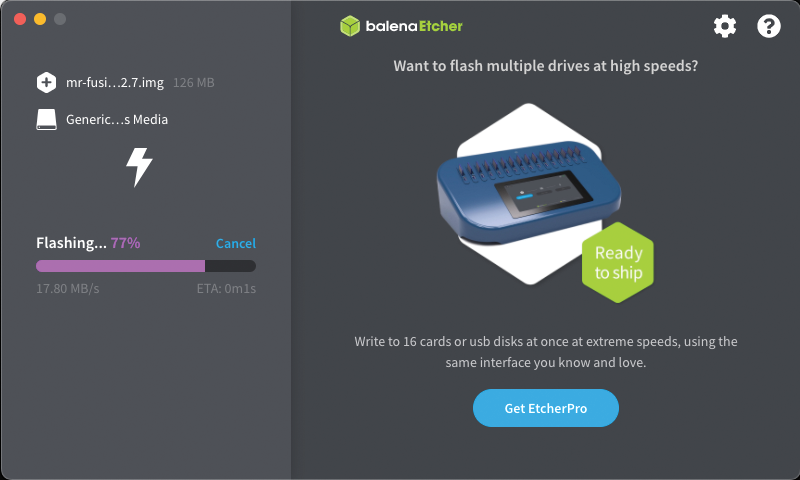
If your MiSTer does not come preconfigured, download the Mr. Fusion Universal MiSTer installation image (at the time of writing, the latest release was version 2.7 from January 24, 2023). Unpack the ZIP file and write the included IMG file to an empty SD card with a tool such as Win32 Disk Imager or balenaEtcher (Figure 5). If you’re a Raspberry Pi user, you’ll be familiar with this step: It’s like writing a Linux distribution image to an SD card.
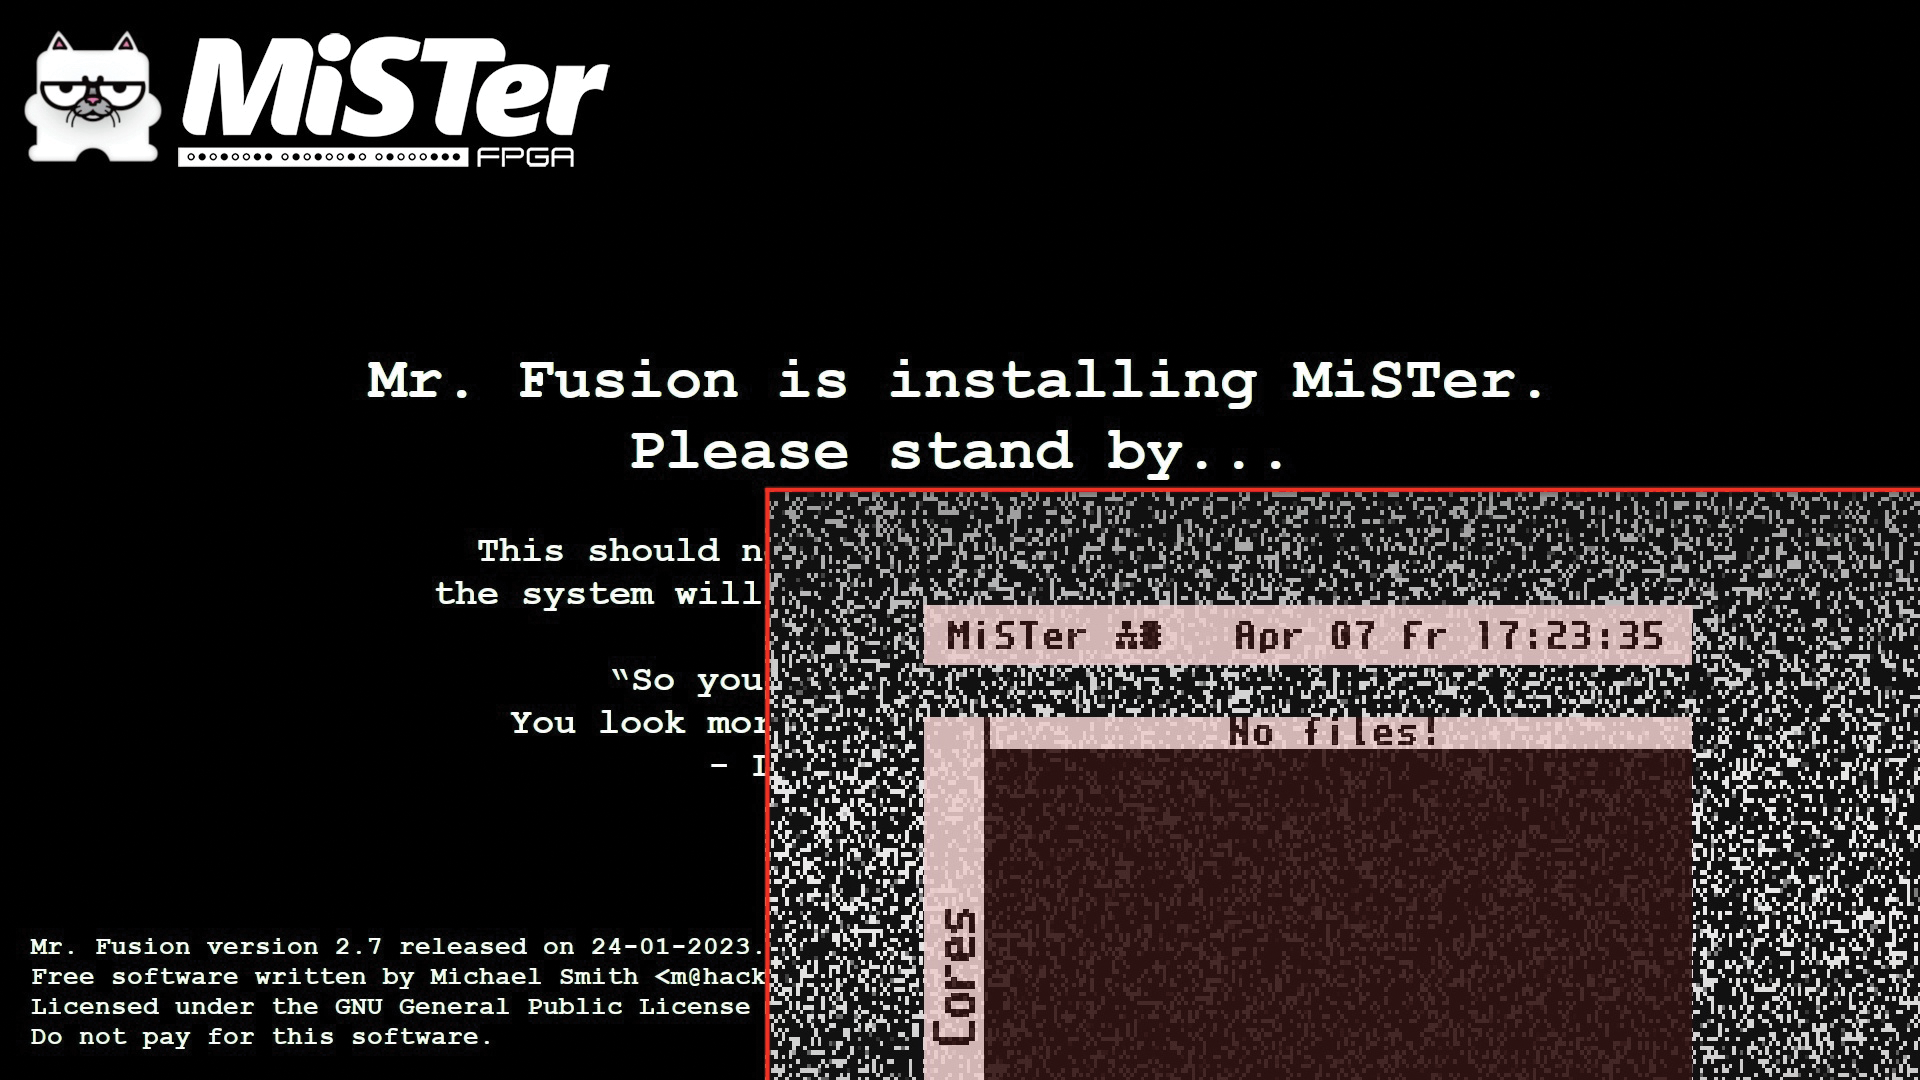
Put the card in the DE10-Nano board’s SD card slot (or primary slot if your system has an I/O board with a second slot), connect a USB keyboard, and start the machine. It should boot from the SD card and display a screen saying Mr. Fusion is installing MiSTer (Figure 6). During this step, the installer will mainly resize the MiSTer partition and the filesystem on the SD card so that it fills up the whole card – that way you can later use the rest of the card for games, filesystem images, and other data. Eventually, the MiSTer will reboot and show a screen with an empty menu and a gray background that looks like old television static (Figure 6, lower right corner).
Turn the MiSTer off, remove the card, and put it back into the computer; you’ll need an extra file that improves the installation routine. The SD card should now show up as a volume called MiSTer_Data. Open the Scripts folder on that volume, which will contain only two files (update.sh and wifi.sh).
Update Script
Visit the Update All project GitHub repository, download the update_all.sh file, and then copy it into the Scripts folder. Safely remove the card, put it back into the MiSTer, and turn it on. It will boot into the same empty menu you’ve seen before.
If your MiSTer is connected to the local network (via the Ethernet port) and your router runs a DHCP service that provides IP addresses, you should already be able to reach it from other computers: Try pinging it; it will have the hostname mister. If you cannot find it, press Esc and the left arrow key once, which brings you to an info screen that also displays the IP address.
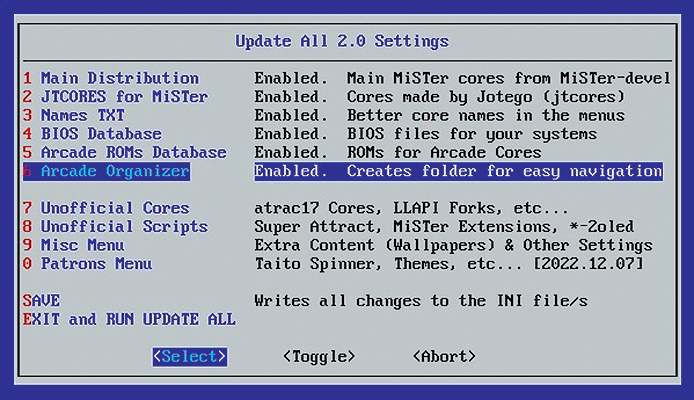
For a basic setup, press Esc, and navigate the menu with the up and down arrow keys and Return (for selecting an entry). Select Scripts | Yes | update_all. That will launch the MiSTer Downloader, which switches to text mode (with a tiny font). After a few seconds, it will display a countdown – press the up arrow to enter the Update All 2.0 Settings screen and make sure that the first six options are all set to Enabled (Figure 7). Select SAVE and then EXIT and RUN UPDATE ALL.
The download can take some time. On my 100Mb Internet connection, I had to wait 20 minutes for it to complete. I was interested to see where the scripts find the files, so I logged into the MiSTer via SSH and used netstat to see active network connections. As shown in Listing 1, the updater downloaded cores and roms from the Internet Archive (archive.-org). When all updates are installed, the MiSTer reboots.
Listing 1: Checking the Sources
/root# netstat ‑W | grep archive
tcp   32   0 MiSTer.fritz.box:56960  ia902505.us.archive.org:https CLOSE_WAIT
tcp   32   0 MiSTer.fritz.box:38000  ia802200.us.archive.org:https CLOSE_WAIT
tcp   32   0 MiSTer.fritz.box:54820  ia903104.us.archive.org:https CLOSE_WAIT
tcp   32   0 MiSTer.fritz.box:59558  ia902809.us.archive.org:https CLOSE_WAIT
tcp   32   0 MiSTer.fritz.box:55676  ia804704.us.archive.org:https CLOSE_WAIT
tcp   32   0 MiSTer.fritz.box:35720  ia802803.us.archive.org:https CLOSE_WAIT
tcp    0   0 MiSTer.fritz.box:51710  ia801803.us.archive.org:https ESTABLISHED
tcp   32   0 MiSTer.fritz.box:56790  www.archive.org:https   CLOSE_WAIT
tcp   32   0 MiSTer.fritz.box:50780  ia801904.us.archive.org:https CLOSE_WAIT
Get Ready to Play
Before playing a game, you first need to connect and configure a gamepad or joystick. When the MiSTer has booted and you see the top menu (with Arcade, Computer, Console, Other, and Utility), press Esc and then select Define joystick buttons. You’ll be asked to press specific keys on the gamepad. Some of the keys will not exist (e.g., Tilt right). Press the spacebar to skip these keys. If possible, make sure that you map MENU to one of the keys so that you can open the menu. (Of course, you can’t do too much with a traditional two-button joystick.)
The joystick or gamepad will now work in many cores, but it is still better to create individual mappings for each core. As an example, go to the menu and select Arcade | Arkanoid (US). The core should start immediately. Press F12 to enter the MiSTer menu followed by the right arrow key, and then select Define Arkanoid buttons. You can then assign gamepad keys to specific actions in the Arkanoid core. When you’ve made the settings, save them. If you start a new core and just press some keys on the gamepad, MiSTer will briefly display a set of mappings that it invents on its own. In many cases, you’ll be able to use the core with those mappings, but sometimes there will be functions that you cannot reach.
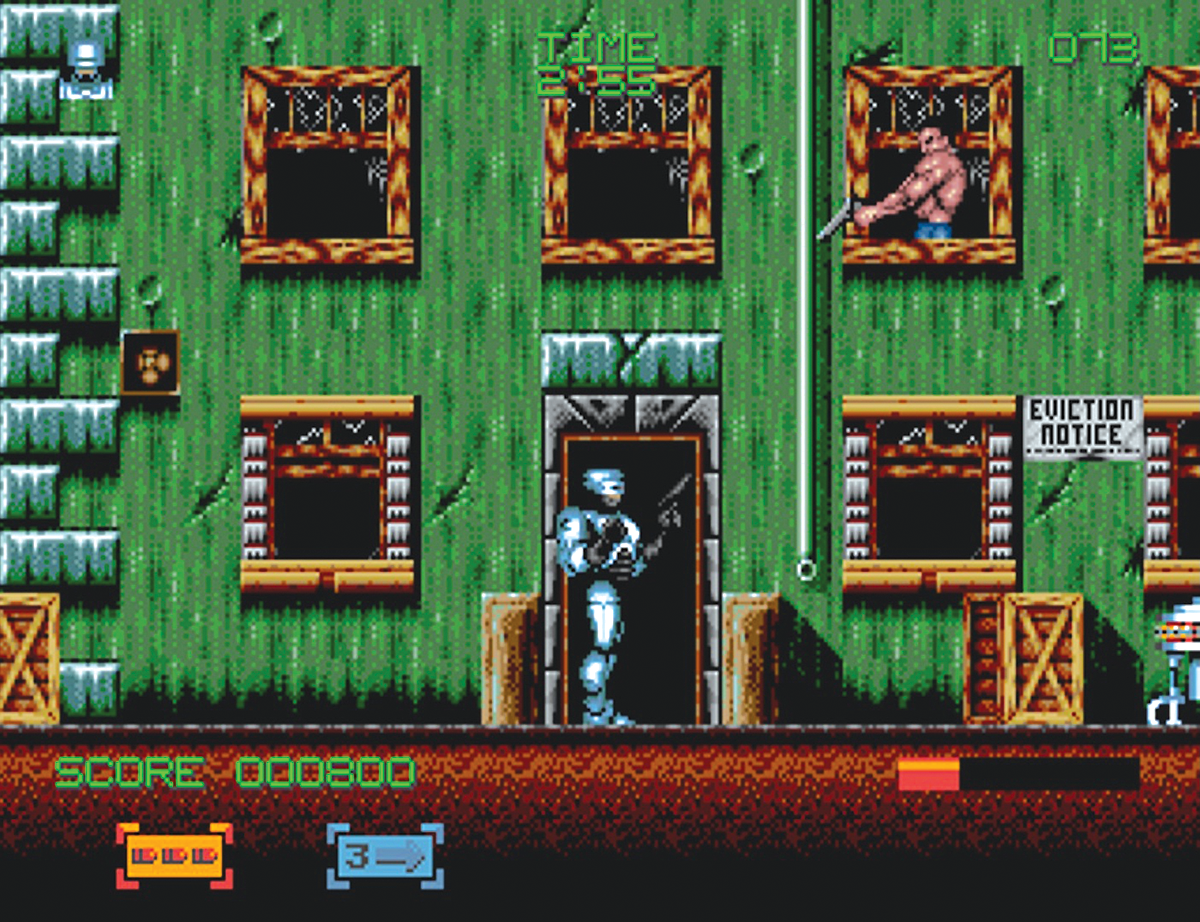
Figure 8 shows RoboCop 3 running on the Sega Genesis core. Each core may have its own way of placing game files on the SD card – in some cases you can just place a ZIP file with a huge collection of games in the right folder. For example, for the NeoGeo core, you can simply place the @MiSTer Pack Add‑on ‑ NEOGEO 2020‑05‑12.zip file from the Internet Archive in the /media/fat/games/NEOGEO/ folder, launch the core, then press F12, and select Load ROM set *.*. This does not work with every core; if it is supported, the ZIP file will appear as a directory.
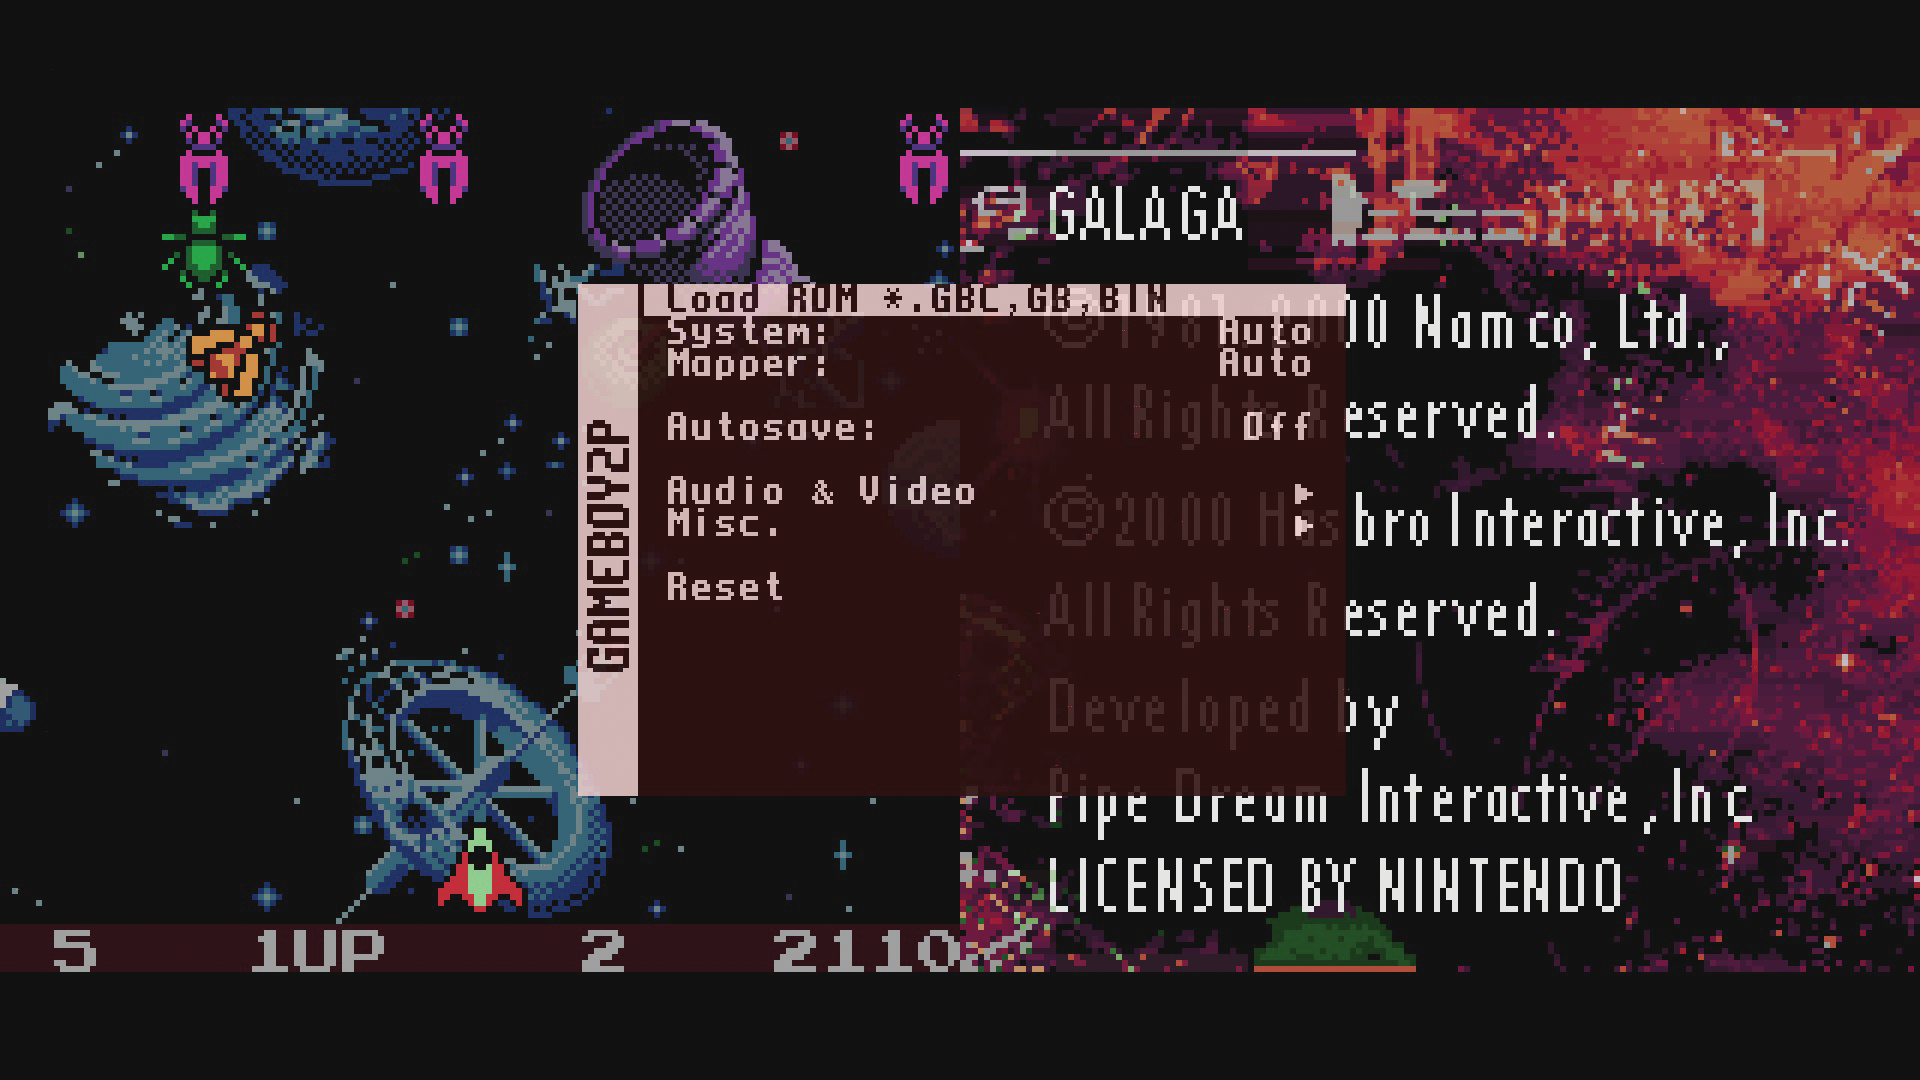
Some cores allow two or more players. For example, the Game Boy Color 2P core shows the contents of two virtual Game Boys in a spilt-screen view. Figure 9 shows a Galaga game where the second player (right side) has not started yet.
Network Access
As mentioned earlier, the MiSTer should have received an IP address from your DHCP server – just like any other modern machine. In the default configuration, the SSH port is open, and you can login as root with the password 1 (one). Obviously, this is not a good choice in an unsafe environment, so you might want to change the password with the passwd command. The MiSTer can also behave like a file server and give you direct access from any SMB/CIFS-compatible computer. If you want to use this feature, you need to enable the Samba service, which you can do after logging in as root. Type the following commands:
cd /media/fat/linux
mv _samba.sh samba.sh
/media/fat/Scripts/samba_on.sh
You can then access the Samba server by opening \\mister\sdcard on Windows Explorer, by pressing Cmd+K and connecting to smb://mister/sdcard on a Mac, or via mount //mister/sdcard /mnt on Linux. If you leave out the sdcard part on Windows or macOS, you’ll be offered several shares that you can mount, with the SD card (sdcard) being just one option. Linux users can check for alternative shares via smbclient ‑L mister. If name resolution of mister does not work, check the IP address in the MiSTer menu.
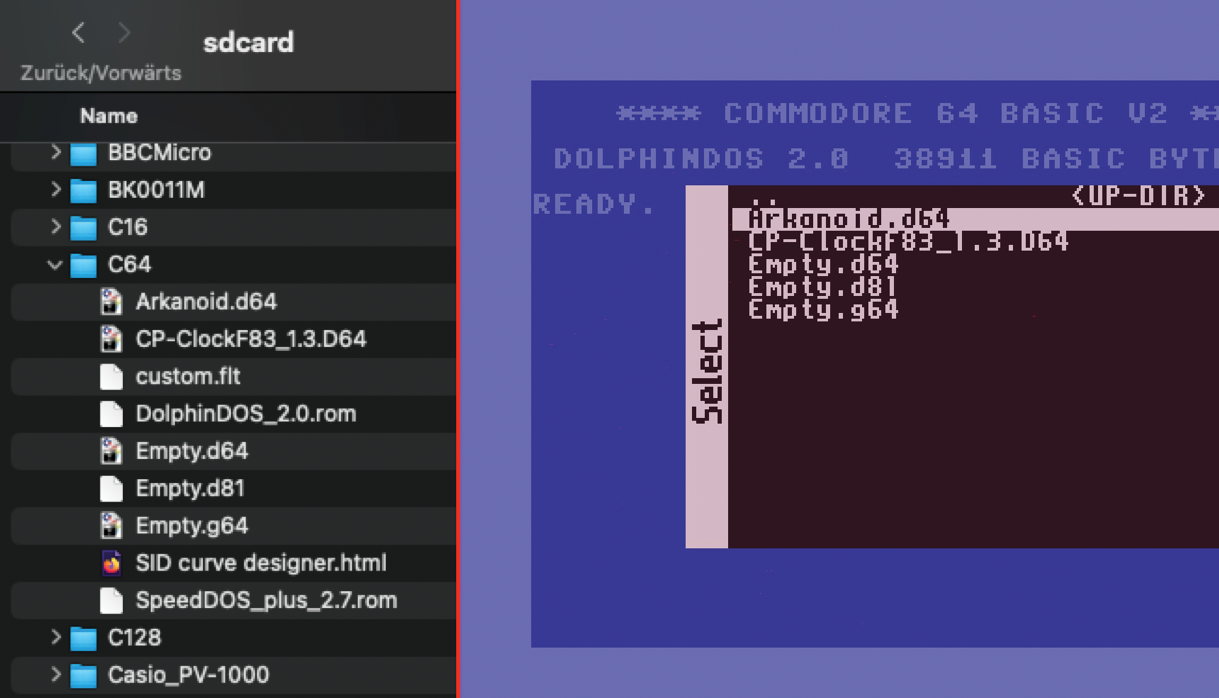
This is perfect for copying downloaded files onto the MiSTer’s SD card or making changes to configuration files without logging into the system via SSH. For example, in order to copy a C64 disk image to the MiSTer, open the sdcard share, navigate to the games/C64/ subfolder, and then place the file in that folder. Next, launch the C64 core (Computer | Commodore 64 in the MiSTer menu). When you see the typical blue C64 screen, press Esc and then select Mount #8…. You should then be able to see the file you’ve just copied via the network (Figure 10).
Set Up a DOS PC
Many retro gamers use the excellent DOSBox PC emulator that comes with a preconfigured DOS installation to run old MS-DOS games. If you want to play all your retro games on the same hardware, you can use MiSTer for DOS gaming, too: One of the many cores, AO486, emulates an Intel 80486-based PC. It has a menu entry named PC (486SX) if you’ve installed the improved core names via update_all. The AO486 boots from floppies, IDE hard disk partitions, and CD/DVD drives. You can load images for up to two floppy disks and four IDE devices.
If you want to set up a DOS system from scratch, you will need install media for some DOS version and create an empty hard disk image file that can serve as the installation target.
You can install FreeDOS, an open source clone of MS-DOS. Login to the MiSTer, enter the AO486 directory, and download and unpack the FreeDOS 1.3 LiveCD in a new freedos folder:
cd /media/fat/games/AO486
mkdir freedos
cd freedos
wget https://www.ibiblio.org/pub/micro/pc‑stuff/freedos/files/distributions/1.3/official/FD13‑LiveCD.zip
unzip FD13‑LiveCD.zip FD13LIVE.iso
(You don’t have to type the path manually. Go to the FreeDOS download page and copy and paste it from there.) Next, create a hard disk image. The following command will create an empty 800MB file:
dd if=/dev/zero of=freedos‑hd.vhd bs=1M count=800
Now start the AO486 core, open the MiST-er menu, and mount the hard disk image to IDE 0‑0 and the CD image to IDE 1‑0. Then select Hardware and on the new configuration page change the Boot 1st entry from Floppy/Hard Disk to CD-ROM by pressing Return a few times.
Press the left arrow key to get back to the previous page and then select Reset and apply HDD. When the FreeDOS boot menu appears, select the Install to harddisk entry, and then perform the typical installation tasks (choose a language, partition drive C:, reboot, restart the installer, format drive C:, select your keyboard layout, and write a new boot sector to drive C:). After formatting, the installer asks which packages you want to install. Choose the Plain DOS system: I tried the alternative (Full installation including applications and games) and the system never completed installation. Finally, say you’re ready; the installer then copies the file to the hard disk image. Once that is done, change the boot order back to Floppy/Hard Disk in the MiSTer settings before letting the system reboot. When DOS is up, you can install some games or other programs.
Virtual Hard Disks
If you search the web for a preinstalled DOS virtual hard disk (VHD) image, you are likely to find files that do not work with the AO486 core. Those VHD files will be disk images for use with Microsoft’s Hyper-V or Oracle’s VirtualBox virtualization software. At the command line, you can use qemu‑img from the Qemu package to convert these VHD images to a format that AO486 can read. The following command converts the Hyper V-compatible FreeDOS1.2.vhd to FreeDOS1.2.raw:
qemu‑img convert ‑f vpc ‑O raw FreeDOS1.2.vhd FreeDOS1.2.rawYou can then delete the old .vhd image and rename the .raw image to .vhd. The fact that the same file extension is used by both systems can cause confusion.
While DOS is running, press Win+F12 to open the MiSTer menu. In most other cores, you can get the menu with F12, but AO486 passes F12 keystrokes through, because F12 is a valid key on a DOS machine that may be needed in some software. If you’re not happy with FreeDOS, you can also install a classic MS-DOS 6.22; an installer is available on the Internet Archive.
Try the DOS Games Pack
Instead of setting up games manually, you can use the MiSTer AO486 Top 300 DOS Games Pack (Total DOS Launcher Release) package available from the Internet Archive (no longer available). This package is so big that it will not fit on a 64GB or smaller SD card. Luckily, MiSTer supports USB sticks and external USB disks. Just use a USB stick that is no smaller than 128GB, or use an SSD and a USB adapter. Repartition and format the USB drive so that it contains just one exFAT partition and give the partition a volume name; I chose MiSTerUSB. Then connect the drive to the MiSTer: It will show up in the /media/usb0 folder. Copy the AO486 folder from the SD card (/media/fat) to the USB drive with:
mkdir /media/usb0/games
cd /media/usb/games
cp ‑r /media/fat/games/AO486 .
Then unmount the USB drive via
cd ; umount /media/usb0
and remove it from the MiSTer. On your computer, download the DOS Games Pack. If you’re using a system with a Bash shell, you can download all required files with the following:
for i in $(seq 1 17); do wget $( printf "https://archive.org/download/top‑300‑final/Top300FINAL.zip.%03d" $i); done
However, downloading the 66GB of data might take some time depending on your Internet connection. On my home system with a 100Mb DSL line, I had to wait for several hours. Once the files download, combine them into one ZIP archive:
cat Top* >Top300FINAL.zip
Change to the USB sticks’s root directory (use cd /Volumes/MiSTerUSB/ if you’re on a Mac and have followed my volume naming suggestion). Go to the games/AO486 folder and unpack the ZIP archive:
cd games/AO486/
mkdir oldrom
mv boot?.rom oldrom/
unzip ~/Downloads/Top300FINAL.zip
(assuming that you’ve placed the huge ZIP file in ~/Downloads). By unpacking, the size grows to 94GB. When this step completes, safely unmount the USB drive and connect it to the MiSTer. Now there will be two folders named AO486 – one on the SD card and one on the newly created USB drive. The USB folder takes precedence, so MiSTer will ignore the SD card folder for this core. (The data in games/ on the SD card is still available for all other cores.)
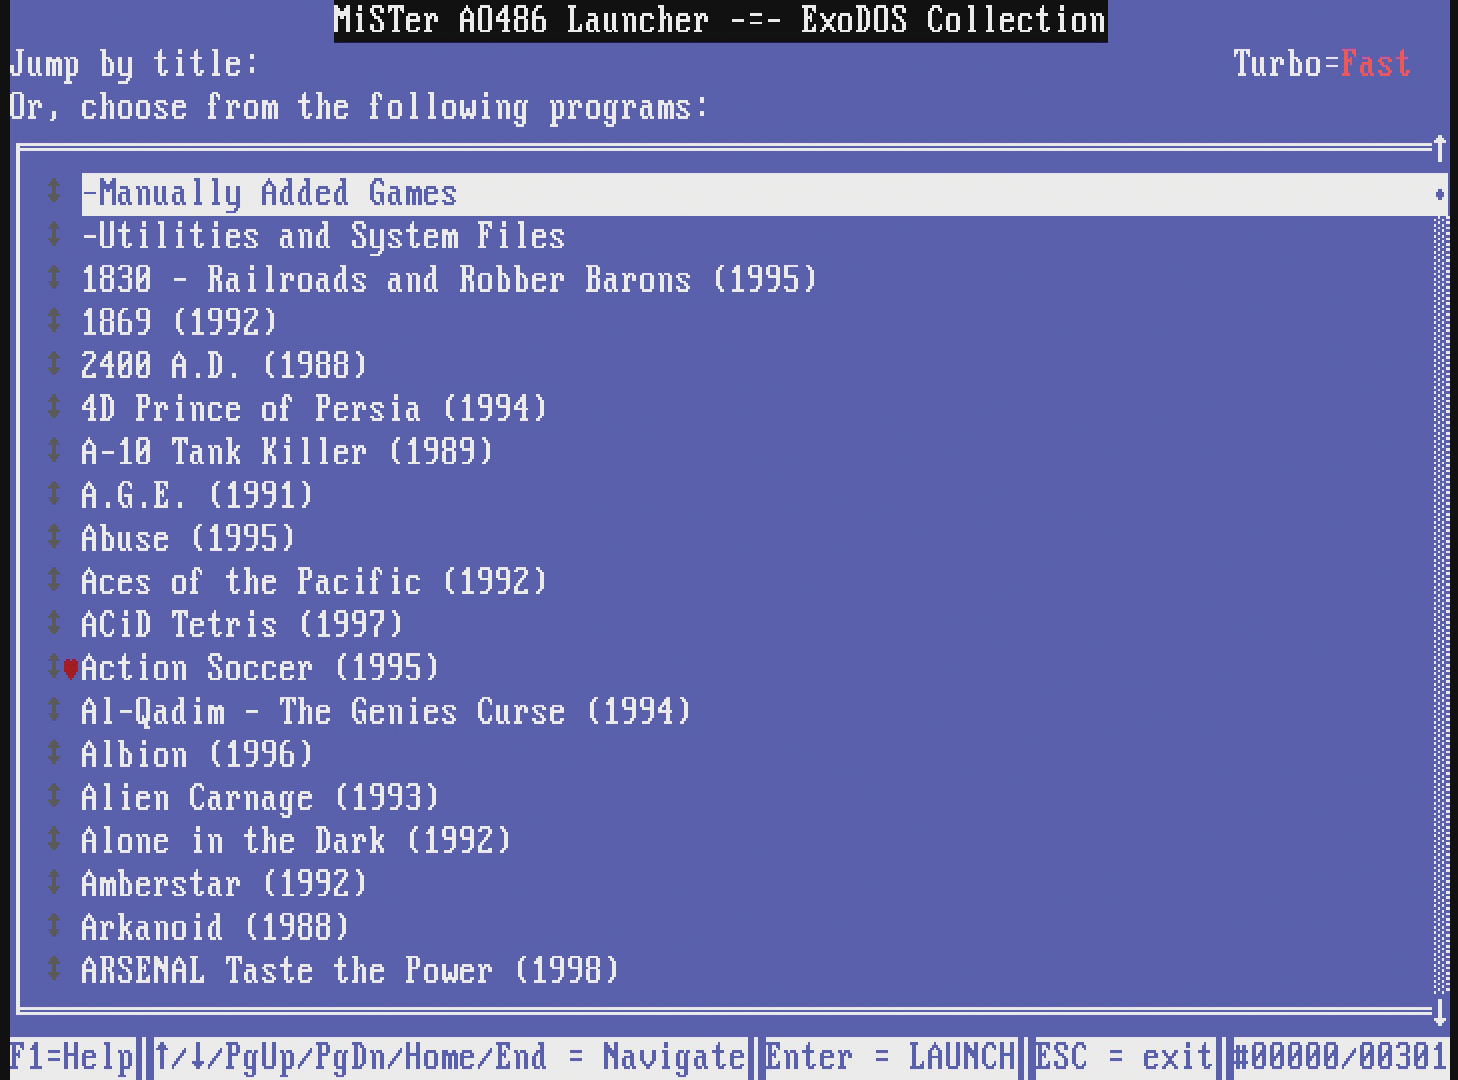
Enter the AO486 core options and load the IDE 0‑0 BOOT‑DOS98.vhd and IDE 0‑1 Top 300 DOS Games.vhd disks in the IDE 0-0 and IDE 0-1 slots, and then restart the AO486 core via Reset and apply HDD. DOS will boot, and then you’ll see a menu from which you can start a game (Figure 11).
Final Thoughts
At more than $500, the MiSTer system is expensive. It’s also currently hard to get one, so you may have to order from Europe if you’re unwilling to wait for availability in the US. If you only plan on playing the occasional retro game, you can run all MiSTer-compatible games on a normal PC with MAME and other emulator software – for free. On the other hand, if you’re really into retro gaming and want as authentic an experience as possible (without buying a huge collection of real, old machines), then MiSTer is probably worth the price and the wait.
MiSTer has a very active community on Discord. To see MiSTer in action, check out Lu’s Retro Source YouTube channel for weekly updates as well as review videos – there is a lot of video material online. Happy retro gaming, with or without the FPGA!